16th Feb 2024

Azraf Al Monzim
u/monzim
Setting Up Development Environment For Flutter: A Step-by-step Guide
This blog provides a detailed guide on setting up a development environment for Flutter. From installing Git, GitHub CLI, OpenJDK, Flutter SDK, Visual Studio Code, and Android Studio, this comprehensive tutorial will help you set up all the necessary tools for Flutter development.
Welcome to our guide on setting up a development environment for Flutter! In this tutorial, we will walk you through the step-by-step process of installing and configuring all the required tools to start building Flutter applications.
In this comprehensive guide, we walked through the step-by-step process of setting up a development environment for Flutter. We started by ensuring that the prerequisites, such as the operating system, disk space, Git, and a text editor, were in place. Then, we proceeded to install Git, GitHub CLI, OpenJDK, Flutter SDK, Visual Studio Code, and Android Studio.
After the installations, we configured our IDEs, namely Visual Studio Code and Android Studio, to work seamlessly with Flutter. We created a new Flutter project and ran our first Flutter app on either a physical device or an emulator/simulator.
By following this tutorial, you have successfully established a robust Flutter development environment and are now ready to embark on your journey of building cross-platform mobile applications. Remember to consult official Flutter documentation and community resources for further assistance and inspiration along the way. Happy coding!
Prerequisites
Before we dive into the setup process, make sure you have the following prerequisites installed on your system:
- Operating System: Windows (10 or later), macOS (Mojave or later), or Linux (64-bit)
- Disk Space: At least 6 GB (excluding IDEs and additional dependencies)
- Tools: Git (version 2. x.x or later) and a text editor of your choice
- JDK: JDK version 11+
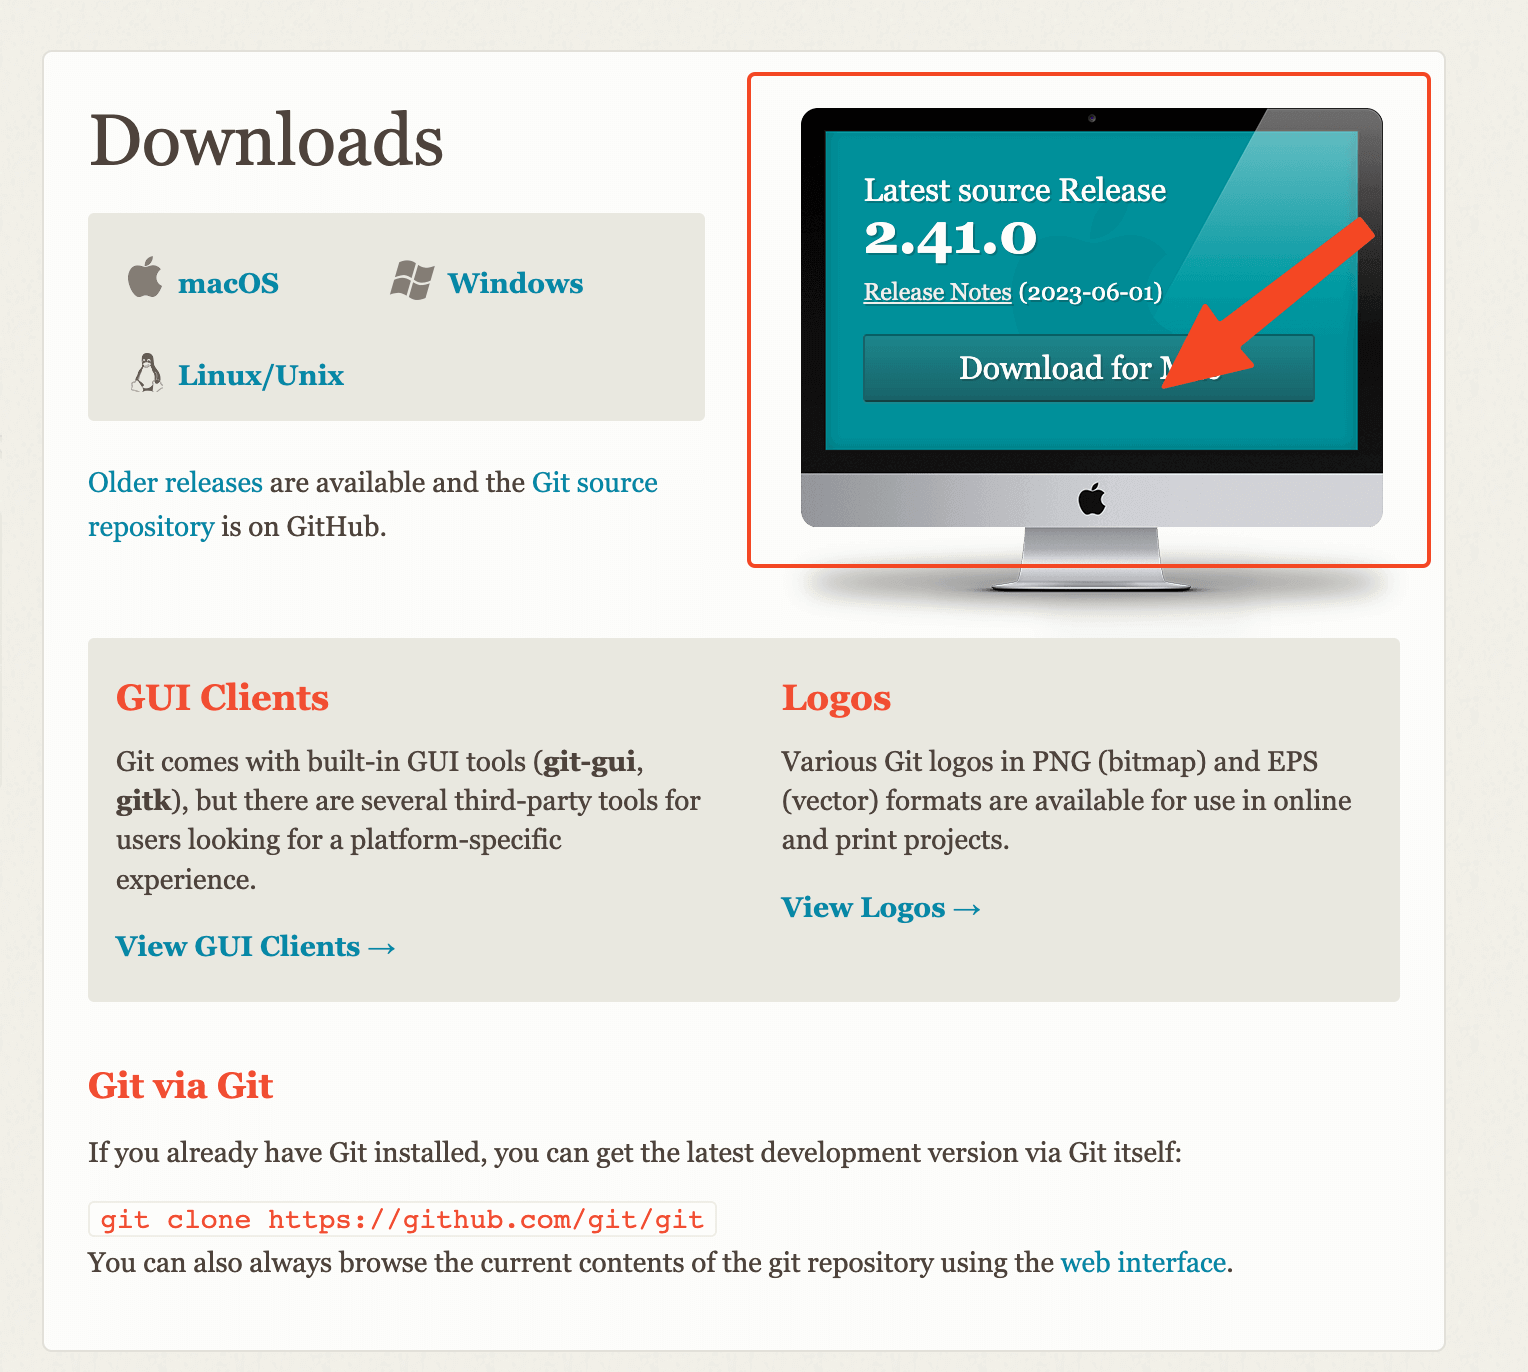
Step 1: Install Git
- Download Git from the official website: **https://git-scm.com/downloads**.
- Run the installer and follow the on-screen instructions to complete the installation. [Install with Default Settings]
# check for git
git --version
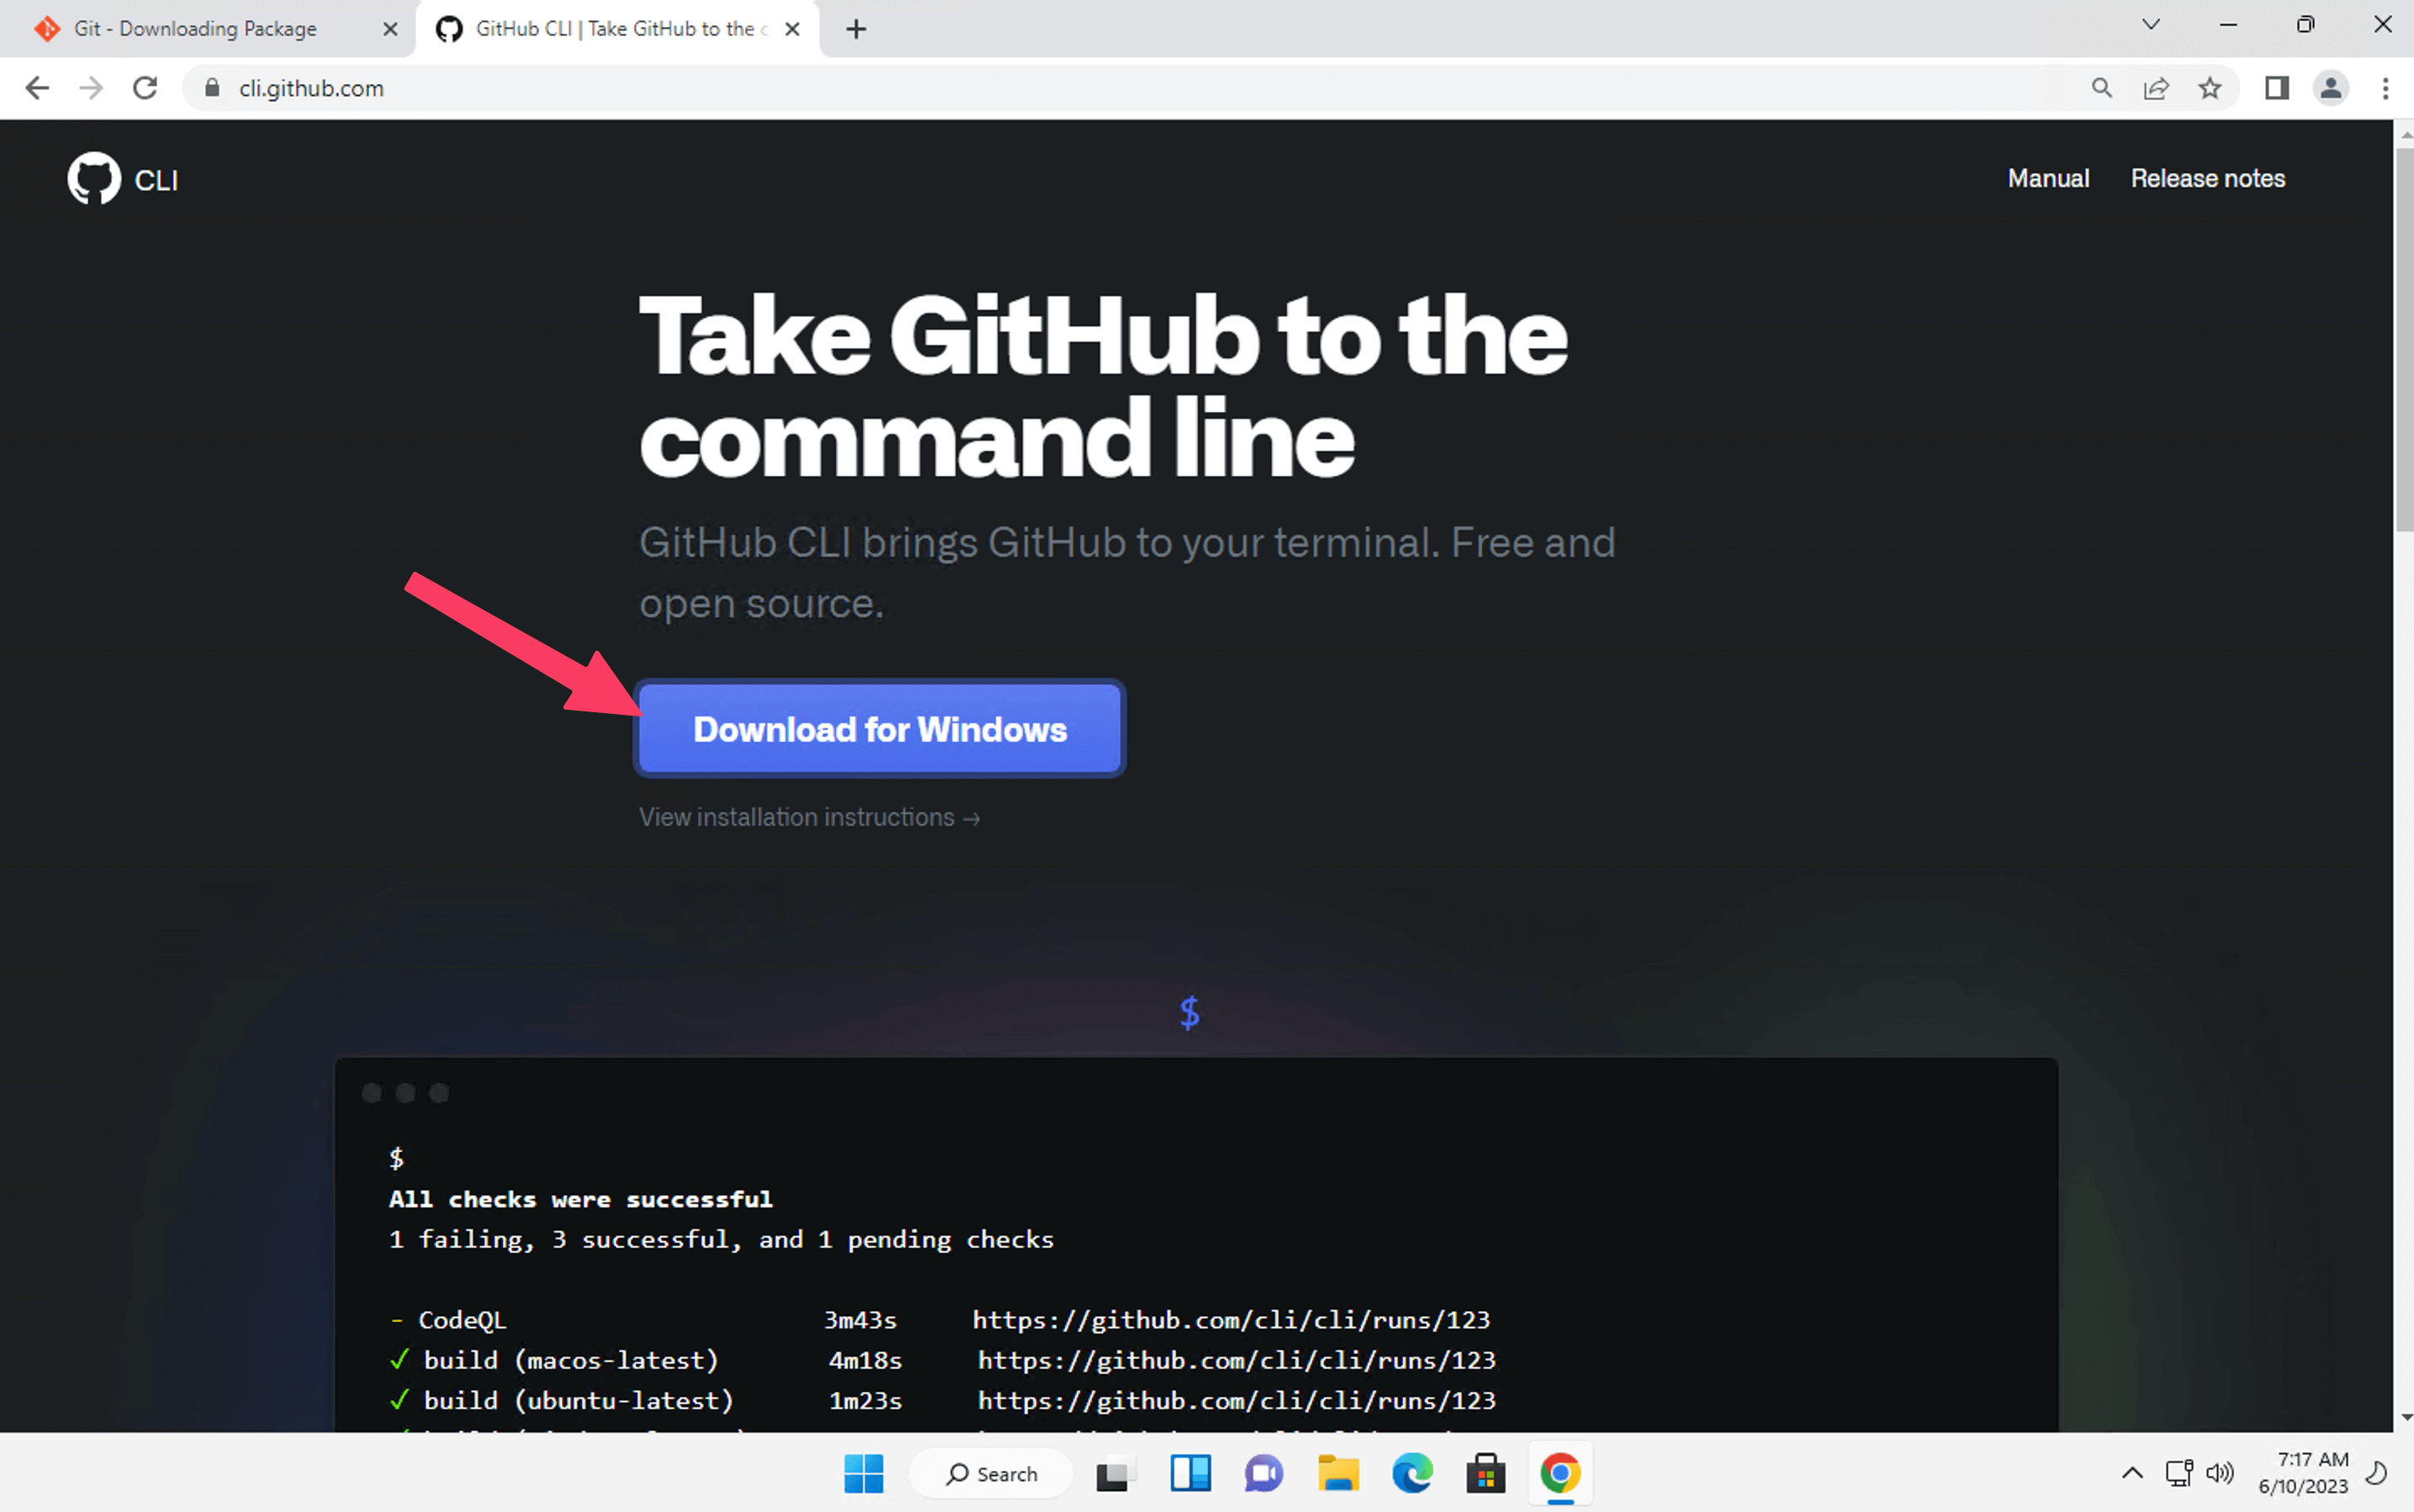
Step 2: Install GitHub CLI
- Visit the GitHub CLI repository on GitHub: https://cli.github.com
- Download and install with default settings
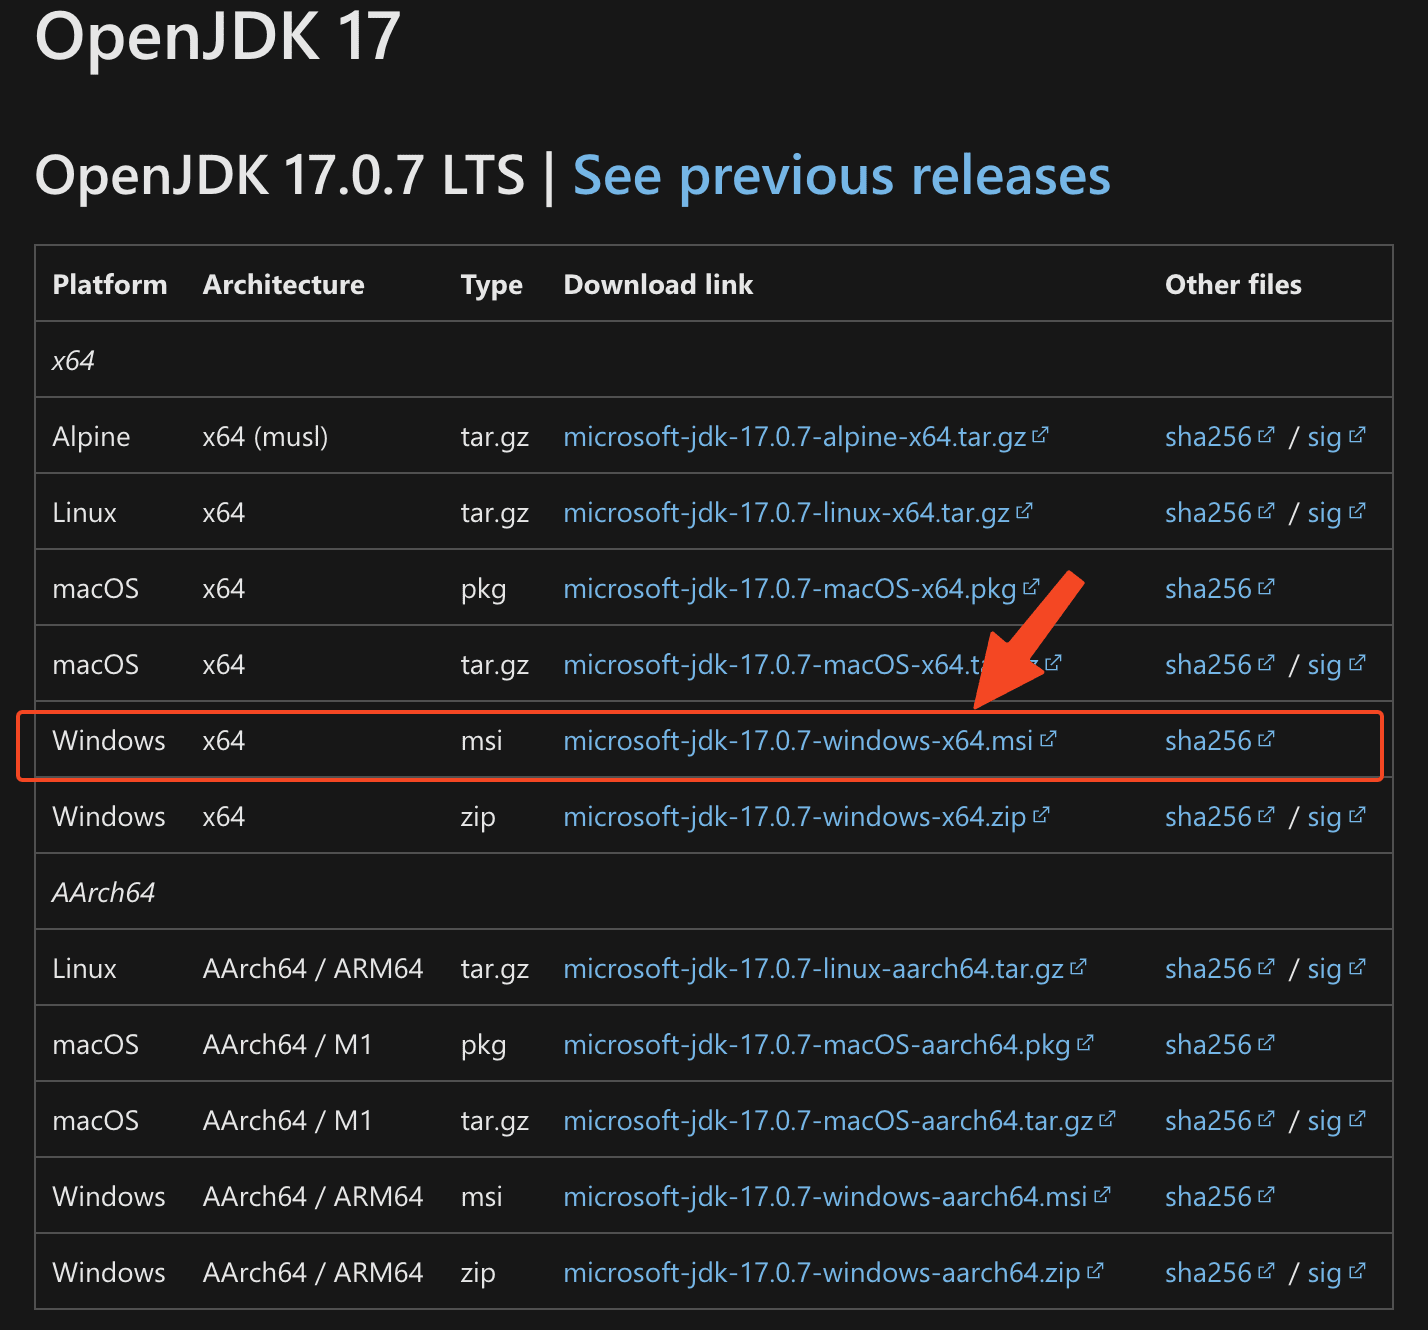
Step 3: Install OpenJDK
- Visit the AdoptOpenJDK website: https://learn.microsoft.com/en-us/java/openjdk/download
- Select your preferred version of OpenJDK and download the installer for your operating system.
- Run the installer and follow the on-screen instructions to complete the installation.
java
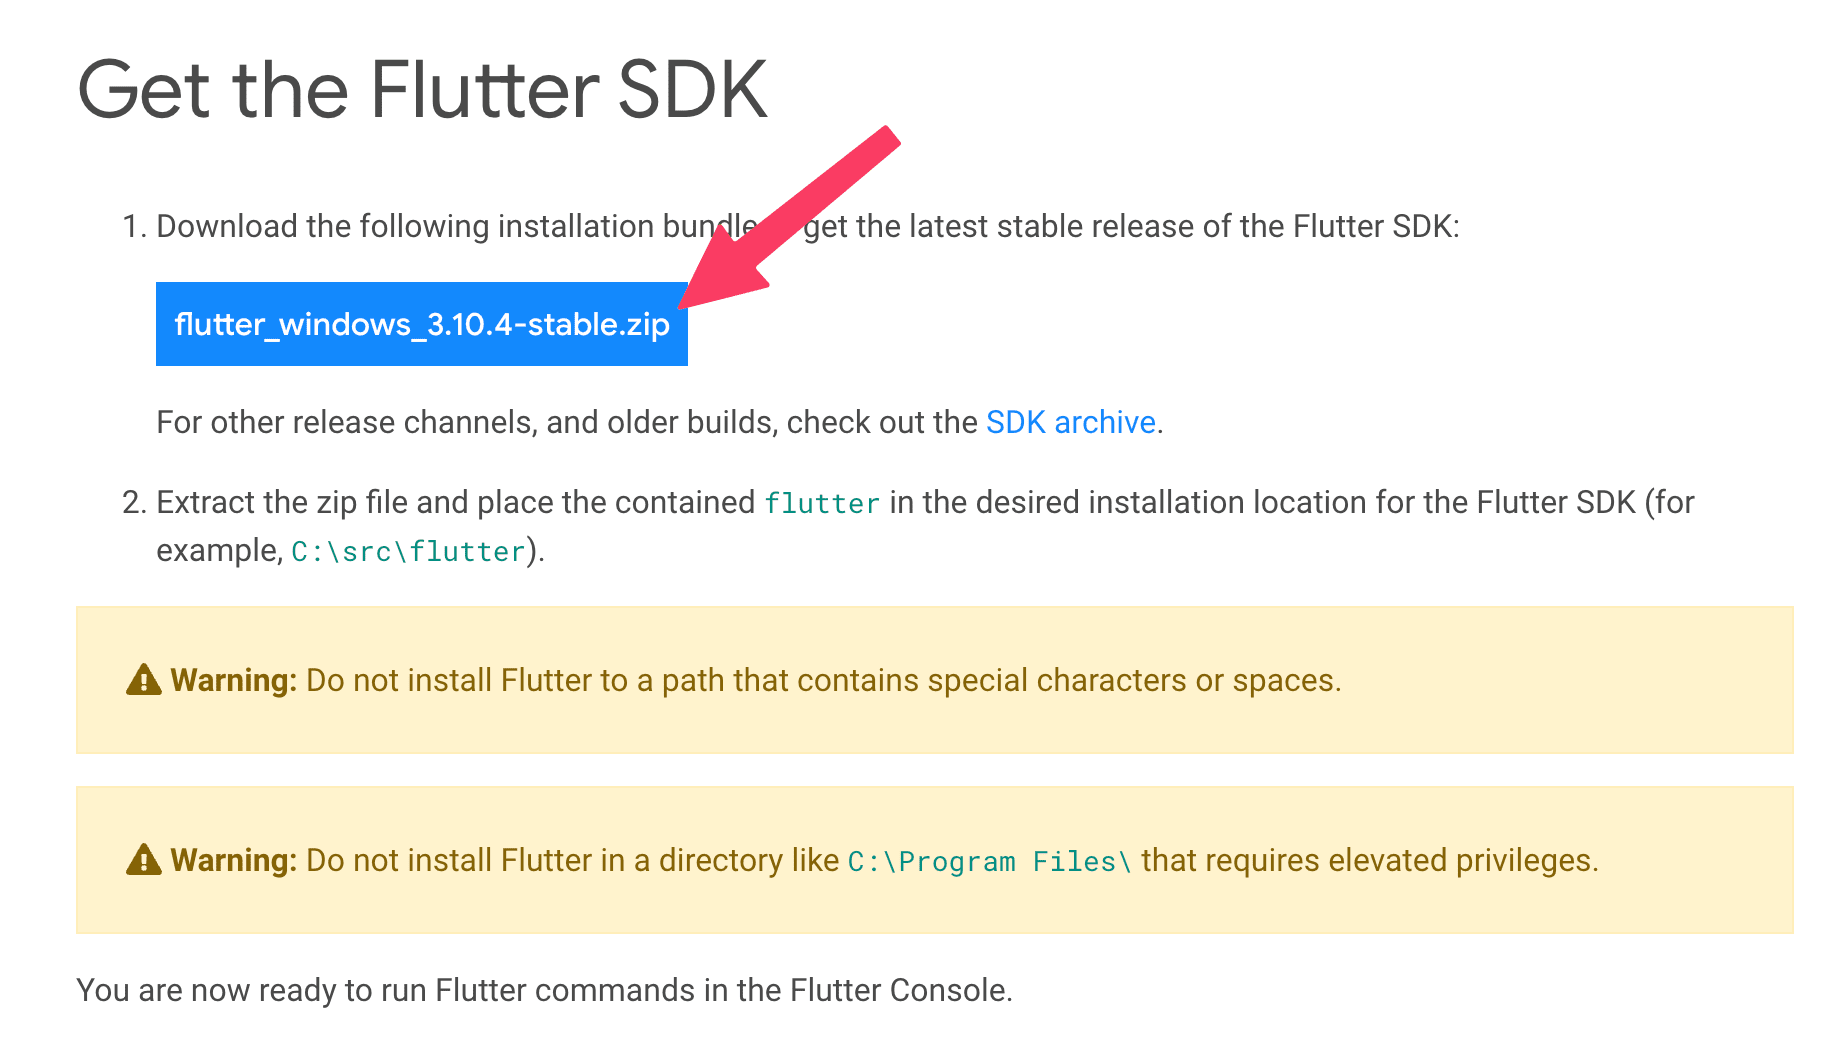
Step 4: Install Flutter SDK
-
Visit the official Flutter website at https://docs.flutter.dev/get-started/install/windows#windows-setup and click on the "Get Started" button.
-
Download the Flutter SDK for your operating system.
-
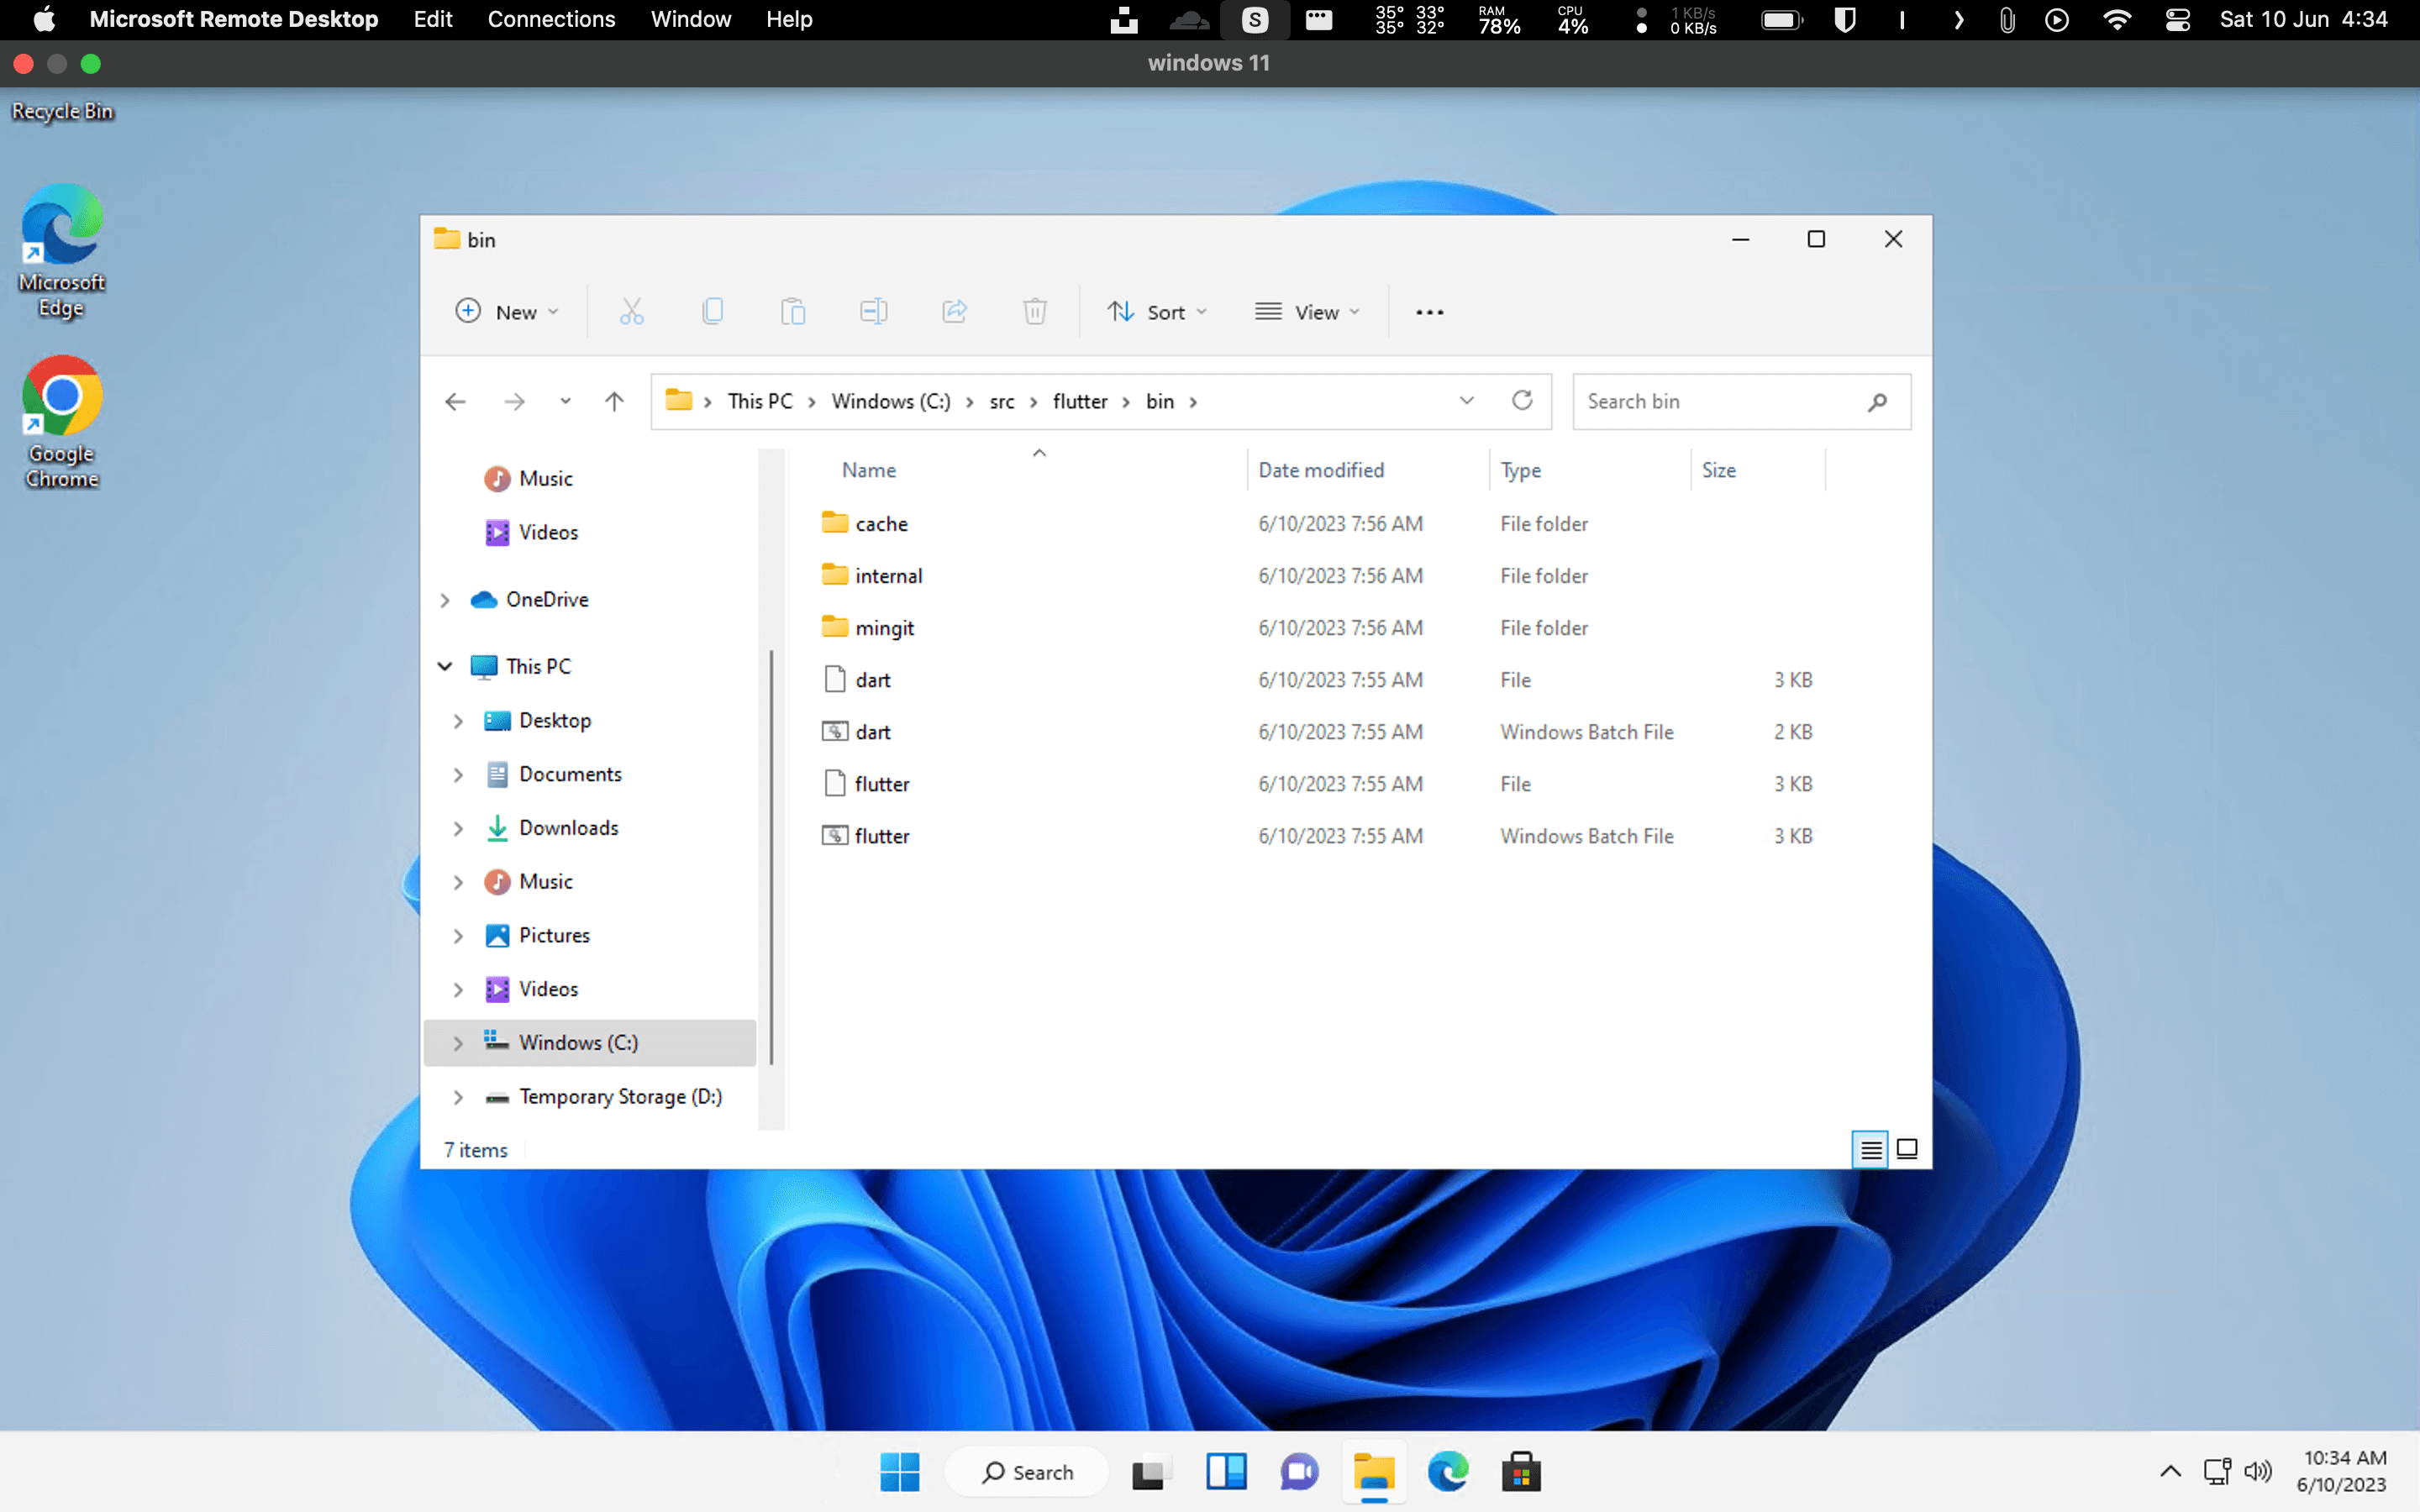
Extract the downloaded file to a location of your choice. For example,
#  on Windows
C:\\src\\flutter
# for macOS/Linux. /Users/your_username/flutter -
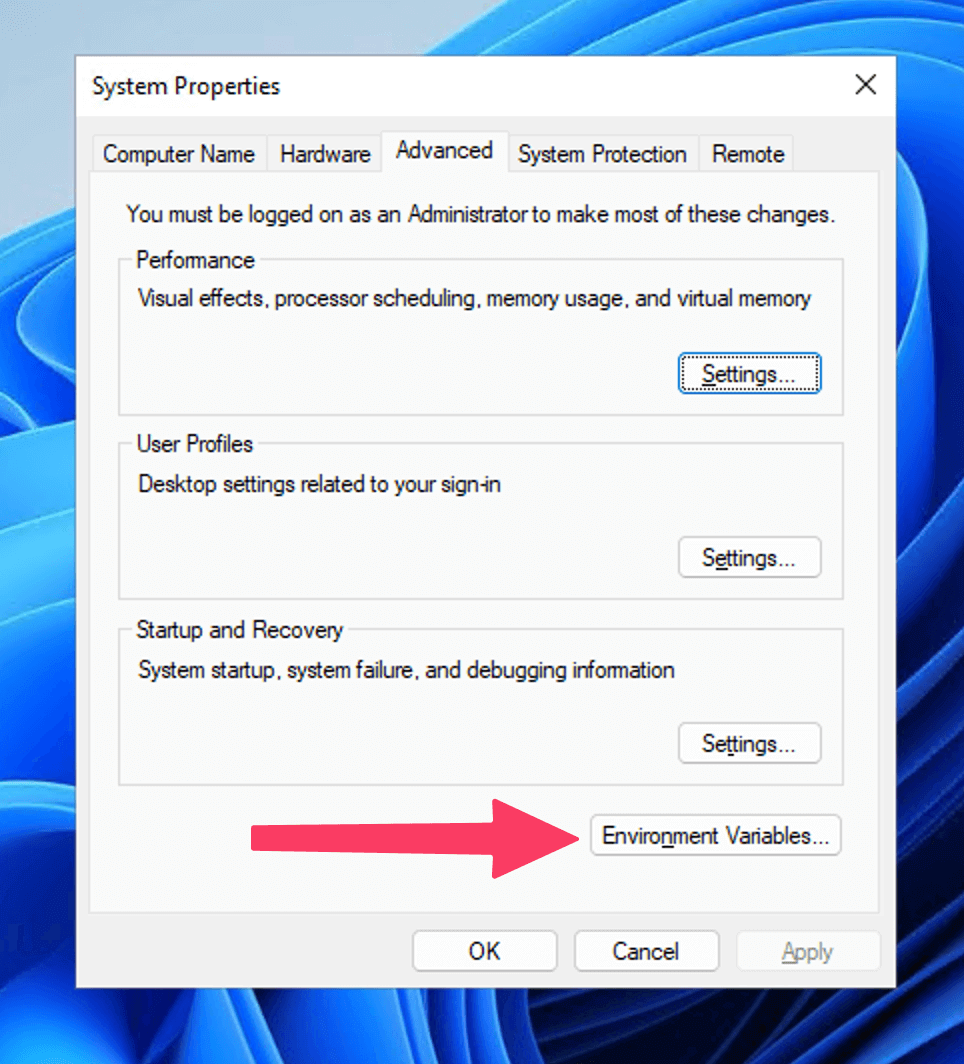
Add the Flutter SDKs bin directory to your system's PATH variable. This step allows you to access Flutter commands from any directory in the command line.
-
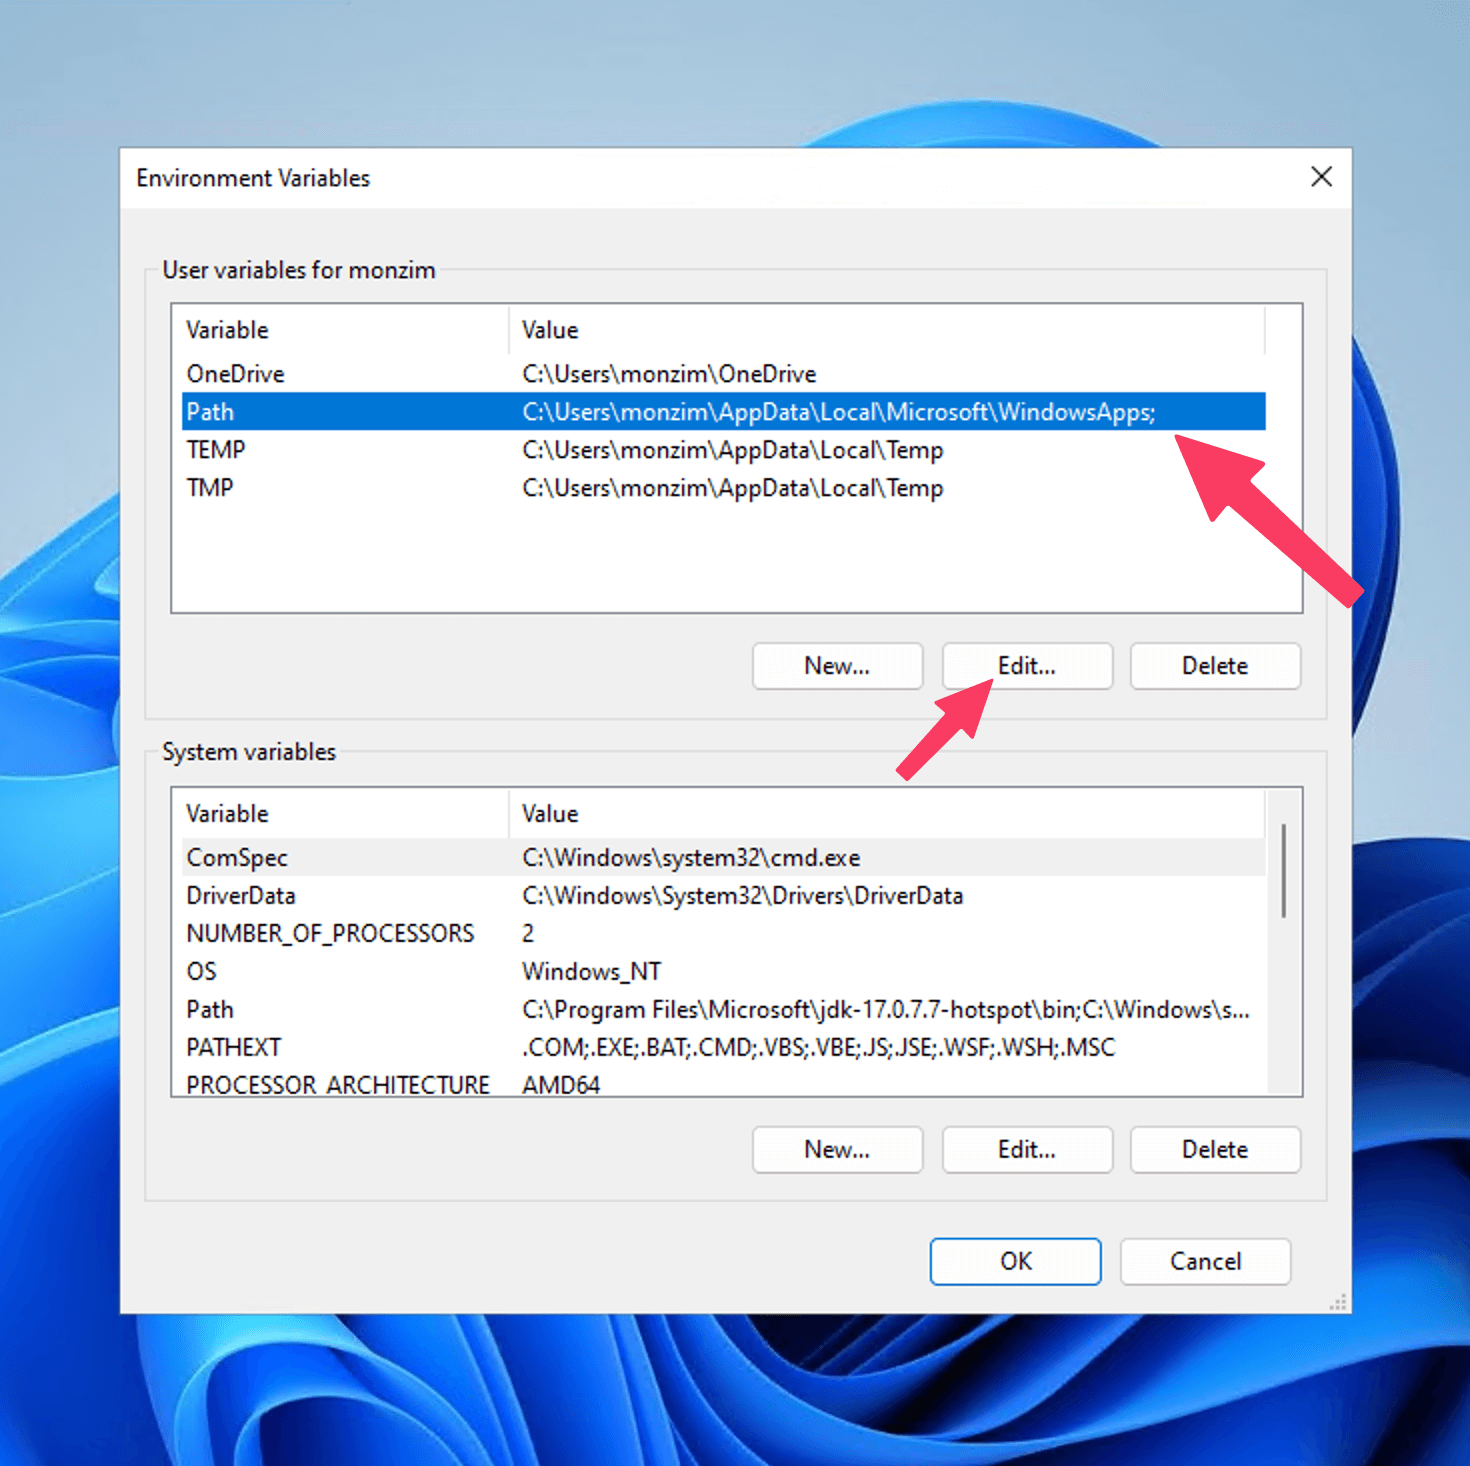
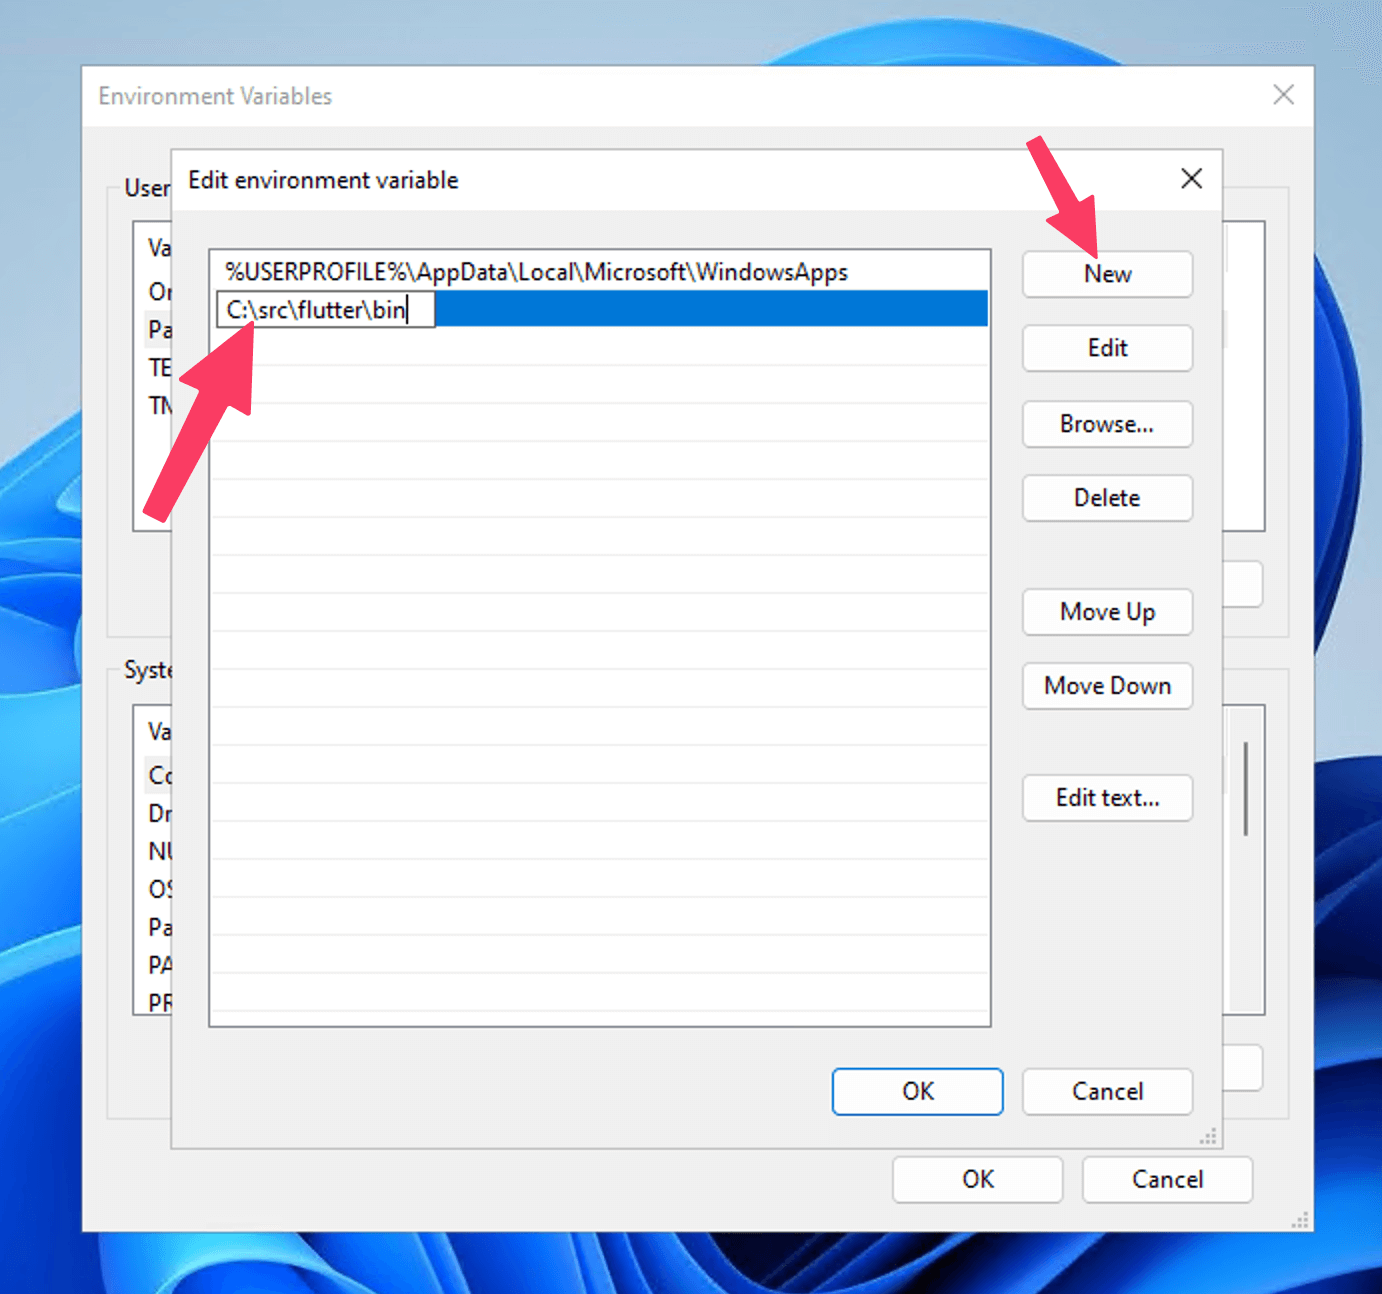
On Windows: Open the Environment Variables settings, find the "Path" variable, and append to it.
C:\\src\\flutter\\bin -
On macOS/Linux: Open the terminal and run the following command, replacing your_username with your actual username:
export PATH="$PATH:/Users/your_username/flutter/bin"
-
-
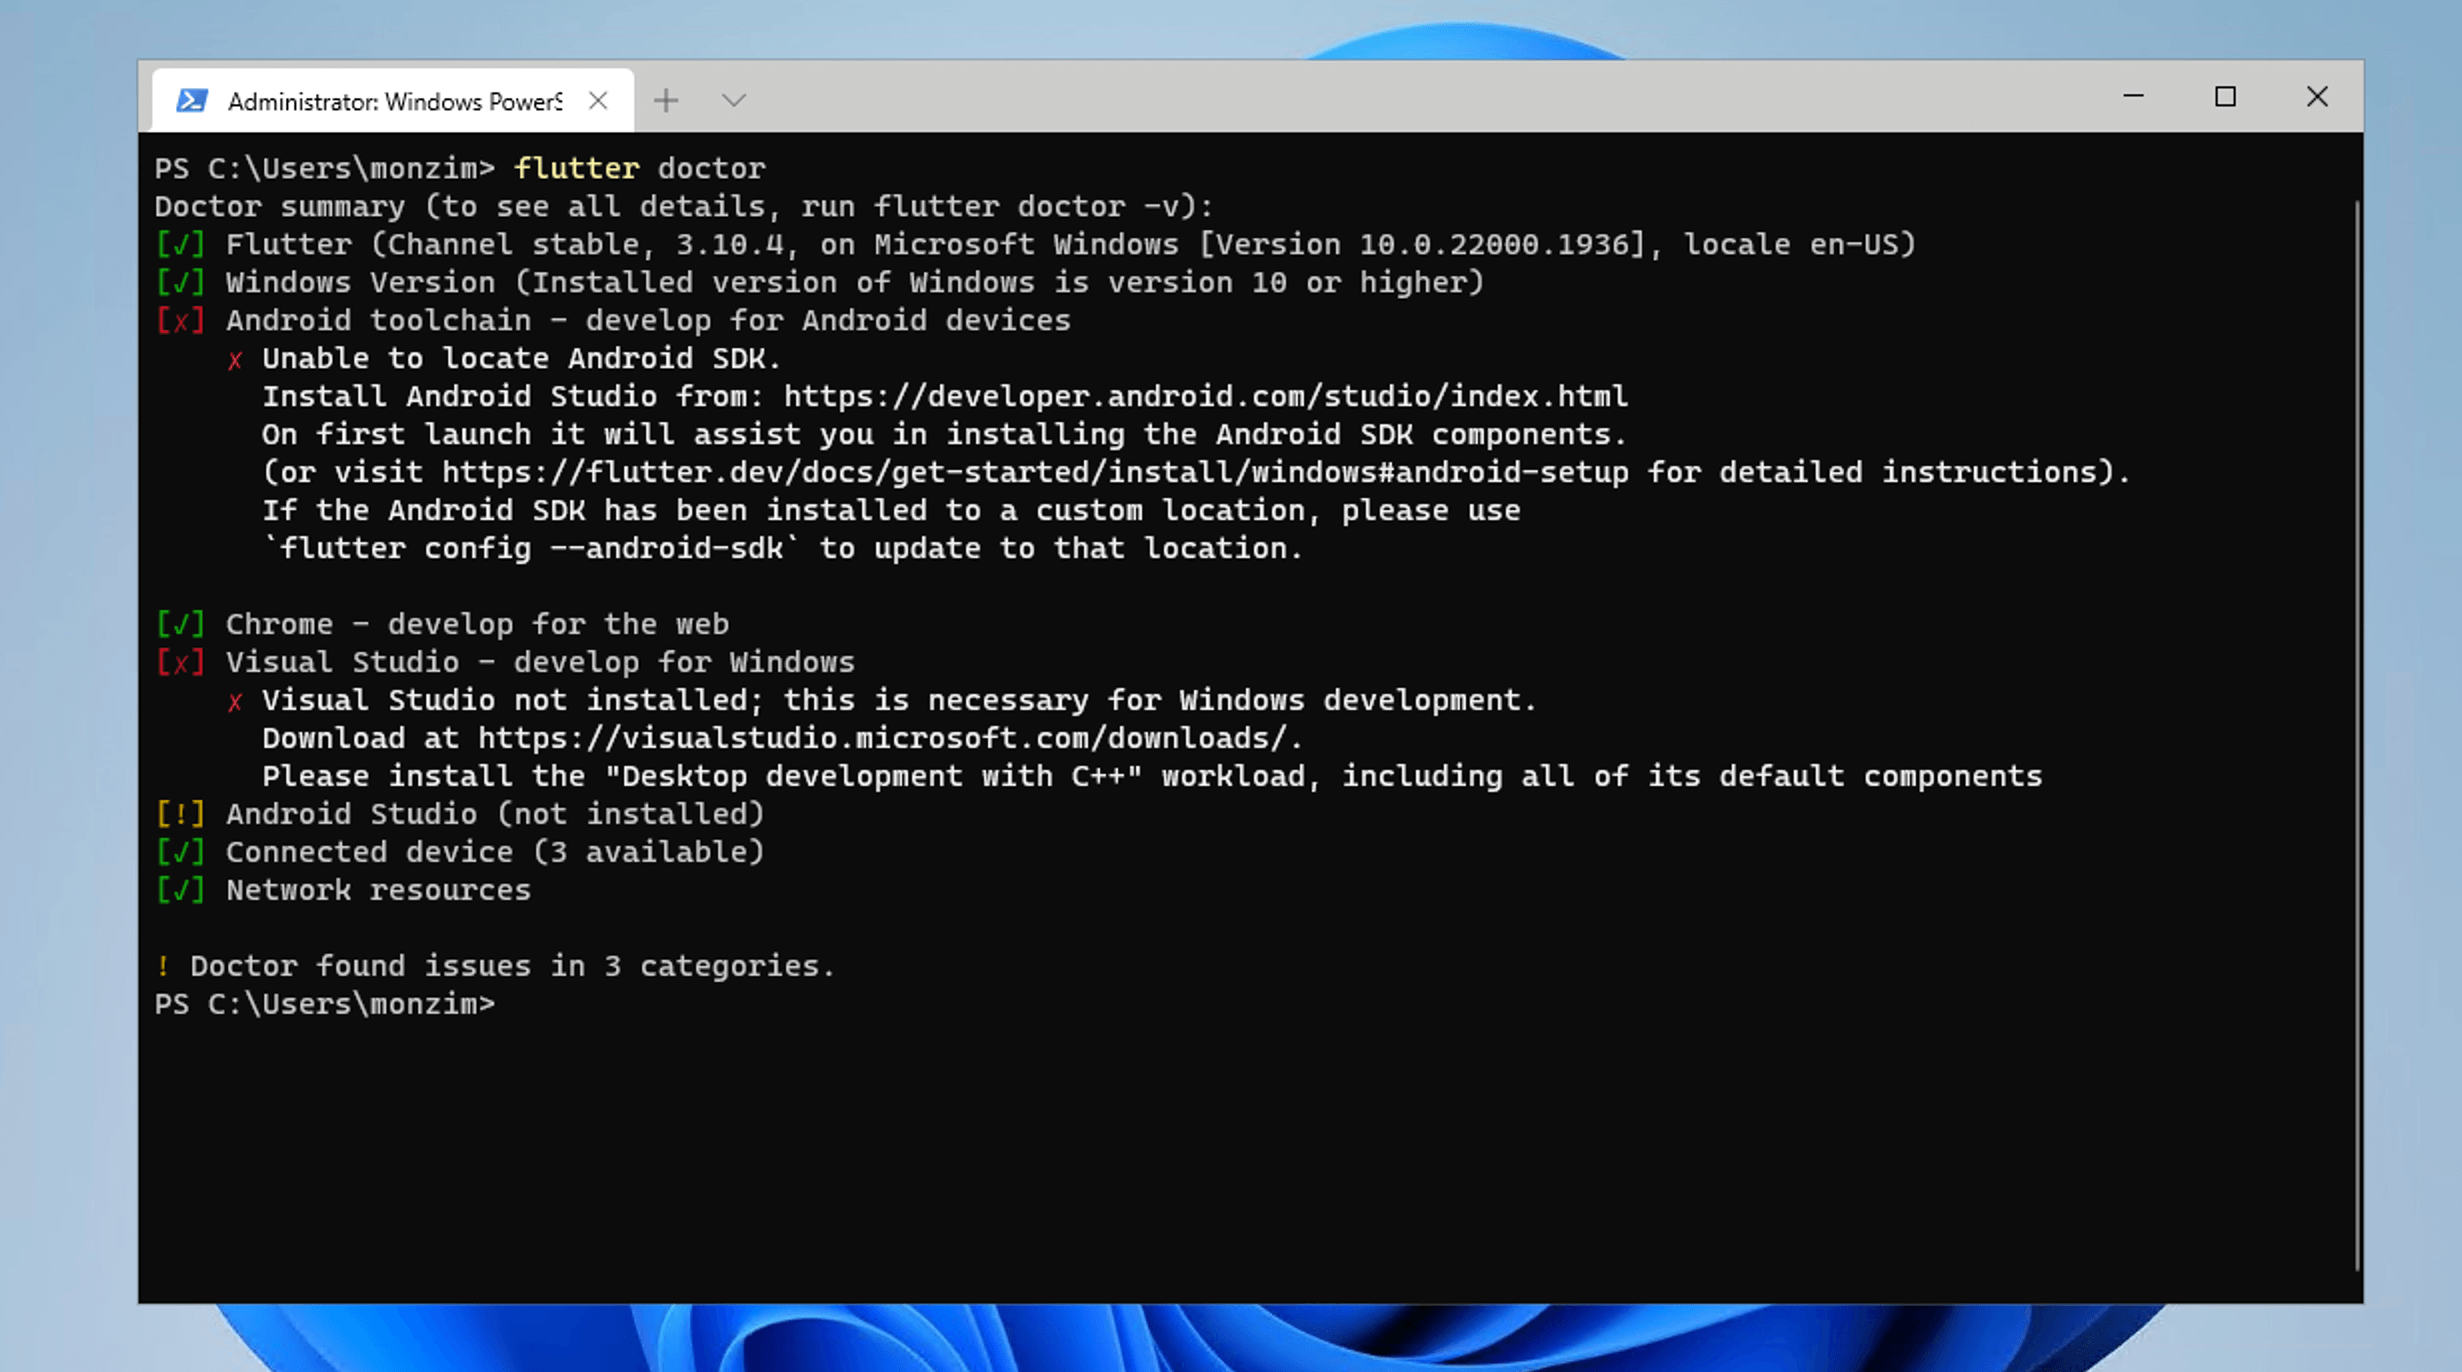
Verify the installation by opening a new terminal or command prompt and running
# checks for any necessary dependencies and provides recommendations if anything is missing.
flutter doctor -v
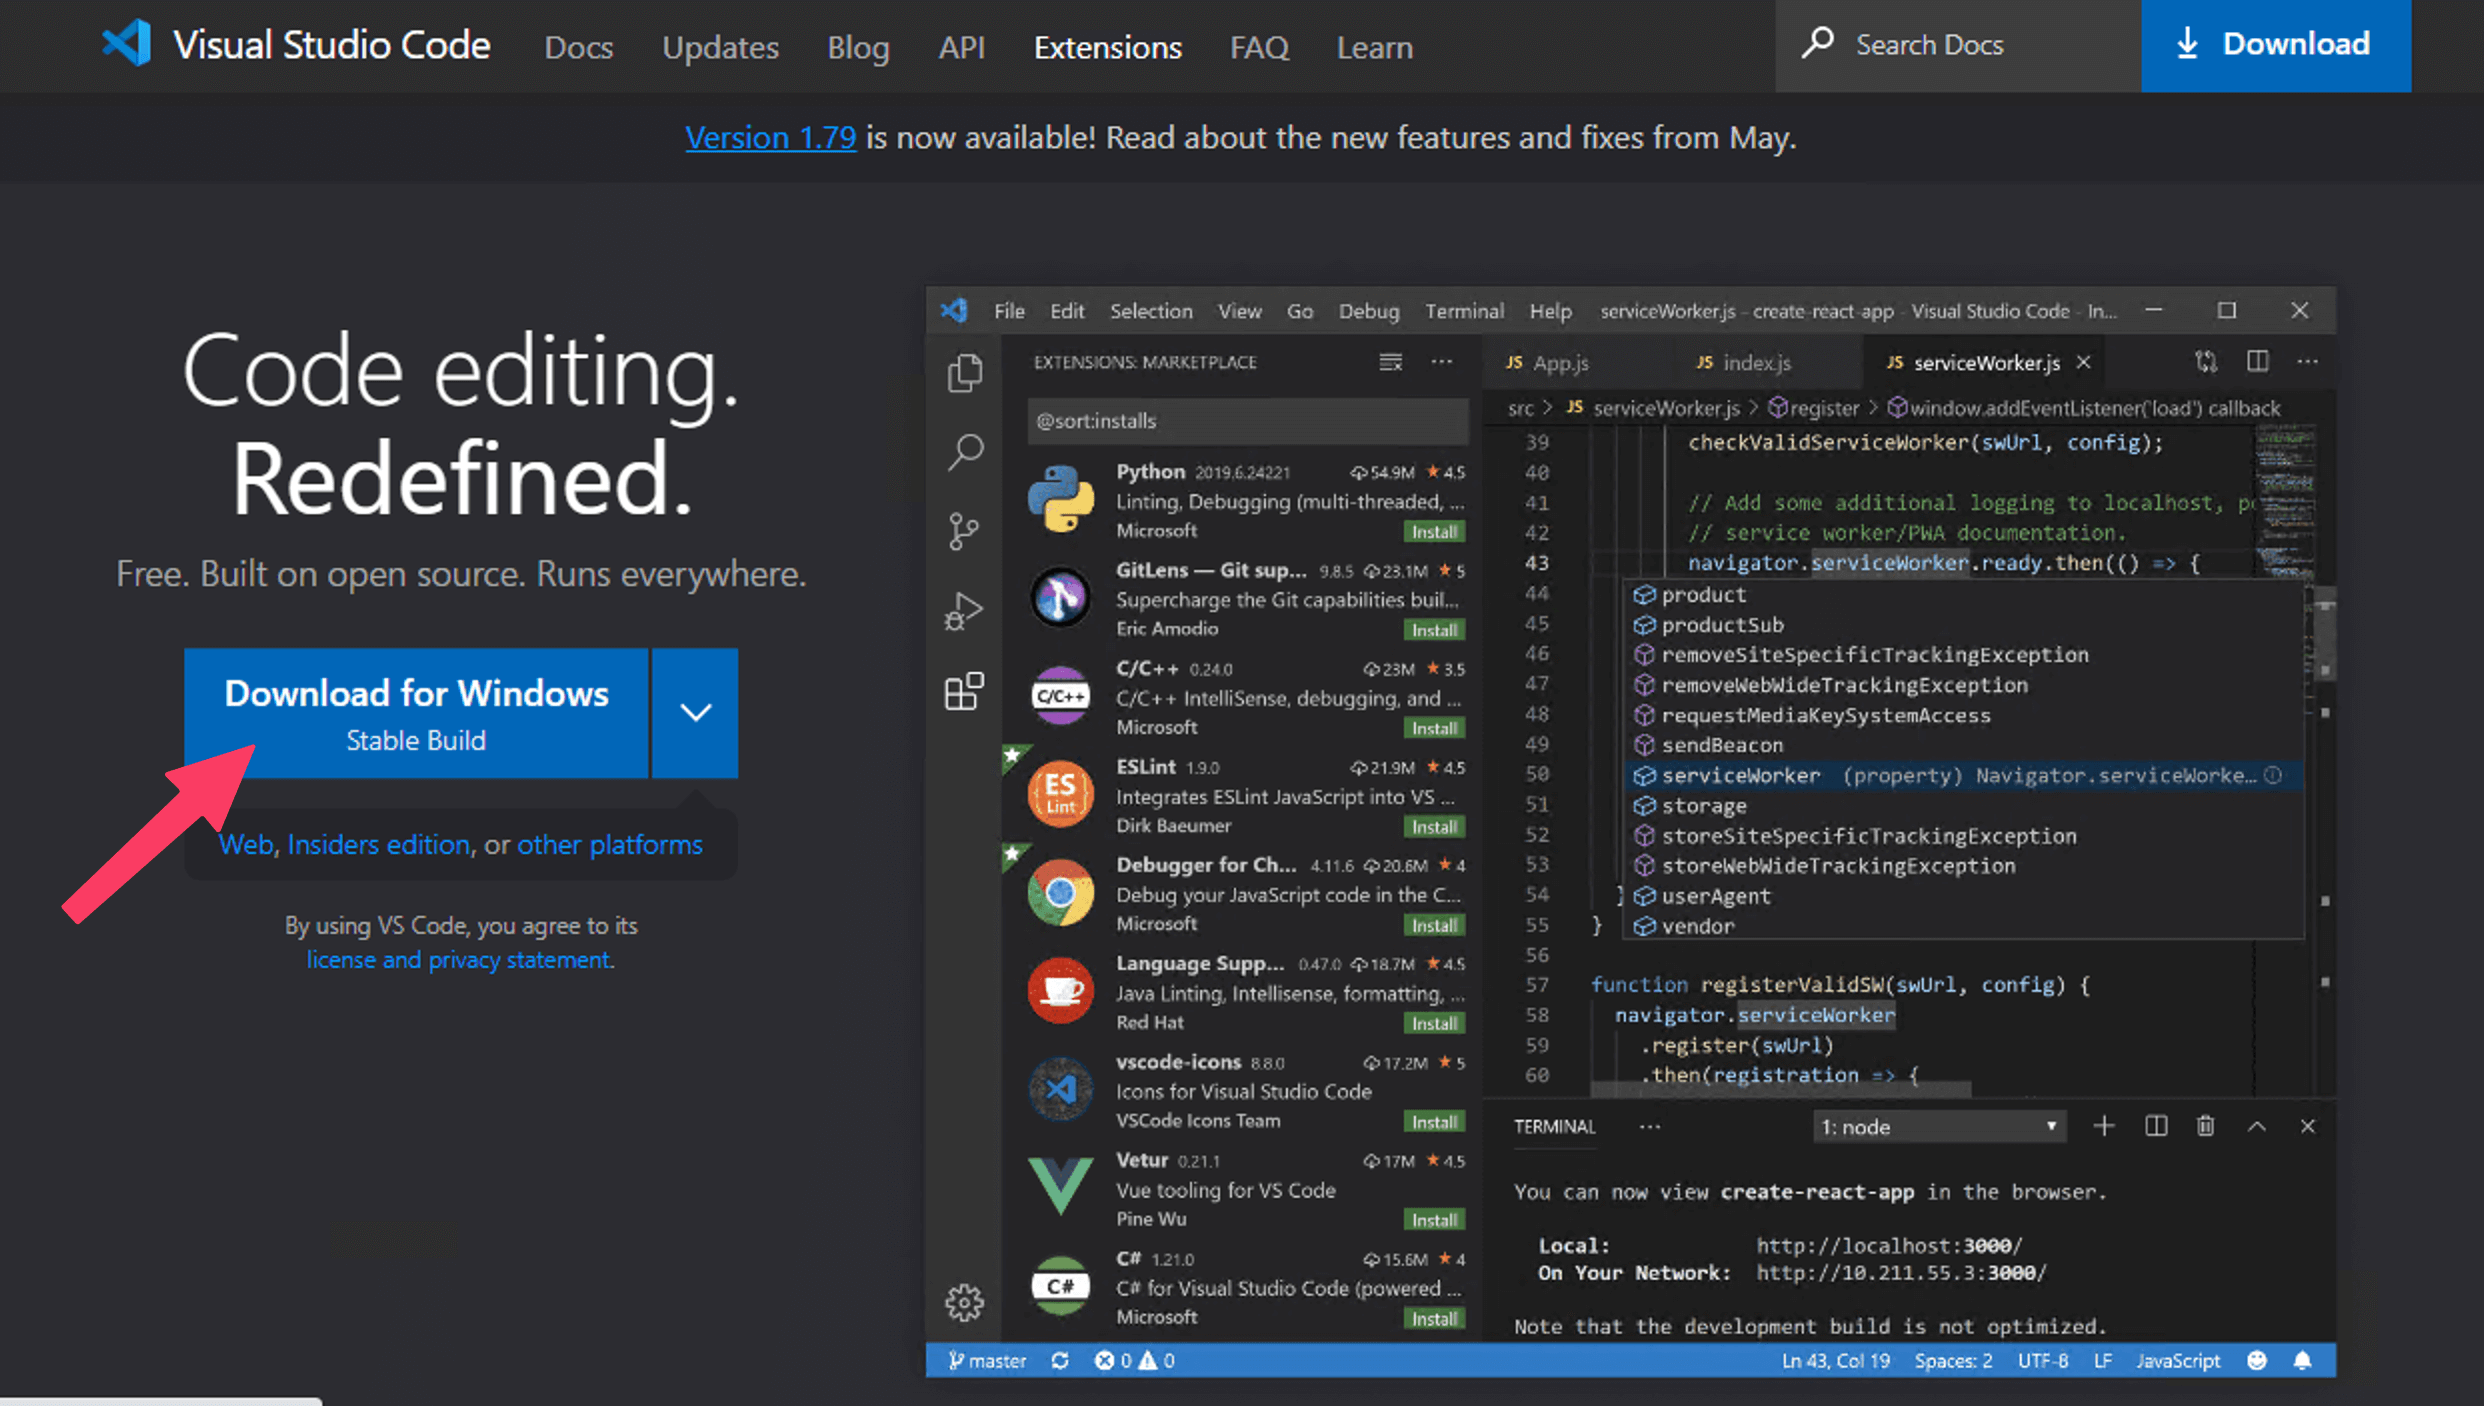
Step 5: Install Visual Studio Code
-
Download Visual Studio Code from the official website: https://code.visualstudio.com/
-
Run the installer and follow the on-screen instructions to complete the installation.
-
Open Visual Studio Code and install the Flutter and Dart extensions by searching for them in the Extensions panel (Ctrl+Shift+X).


Step 6: Install Android Studio
-
Download Android Studio from the official website: **https://developer.android.com/studio**.
-
Run the installer and follow the on-screen instructions to complete the installation.


-
During the installation, make sure to select the Flutter and Dart plugins.
-
Run this command
flutter doctor -
Then accept and run this command
flutter doctor --android-licenses
-
Then run this command again
flutter doctor
Step 6.1: Create an Android Simulator
-
Open Android Studio and open Virtual Device Manager


Step 7: Configure IDE
After installing your preferred IDE, open it and configure it to work with Flutter:
- Open the IDE's settings/preferences and navigate to the Flutter section.
- Set the Flutter SDK path to the location where you extracted the Flutter SDK in Step 1.
- Apply the changes and restart the IDE for the settings to take effect.
Step 8: Create a New Flutter Project
Now that we have everything set up, let's create a new Flutter project:
-
Open your terminal or command prompt and navigate to the directory where you want to create the project.
-
Run the following command to create a new Flutter project: Replace my_app with the desired name of your project.
flutter create my_app
Step 9: Run Your First Flutter App
-
In your terminal or command prompt, navigate to the project directory (my_app in this example).
-
Connect an Android or iOS device to your computer or set up an emulator/simulator.
-
Run the following command to launch your app on the connected device/emulator: If everything is set up correctly, you should see your app running on the device/emulator.
flutter run

Congratulations! You have successfully set up your development environment for Flutter and created your first Flutter app. Now you can start exploring Flutter's rich set of features and building incredible cross-platform mobile applications.
Remember to refer to the official Flutter documentation and community resources for further learning and support on your Flutter development journey. Happy coding!
Conclusion
Congratulations! You have successfully set up your development environment for Flutter. You installed Git, GitHub CLI, OpenJDK, Flutter SDK, Visual Studio Code, and Android Studio, which are essential tools for Flutter development. You are now ready to create amazing cross-platform mobile applications using Flutter.
Remember to refer to the official Flutter documentation and community resources for further learning and support on your Flutter development journey. Happy coding!