
As a platform engineer, CI/CD is the backbone of every team I support. For years, GitHub Actions served as the default — it's tightly integrated, nearly zero-config, and "just works" for most workflows. But as my infrastructure matured and the number of pipelines grew, cracks started to show: opaque billing, limited control over runners, vendor lock-in, and the uncomfortable reality that every build artifact passes through someone else's infrastructure.
This post documents my migration from GitHub Actions to Woodpecker CI — a lightweight, open-source, Docker-native CI/CD system — self-hosted on my own server using Docker Compose. I'll walk through the reasoning, the setup, real pipeline configurations, and an honest comparison of the tradeoffs.
Why Self-Hosted CI/CD?
Motivations for the Switch
GitHub Actions is excellent for getting started, but at scale — or when you care deeply about infrastructure ownership — several pain points emerge:
- Cost at scale: GitHub-hosted runners bill per minute. For teams running dozens of pipelines daily, costs escalate quickly, especially for ARM builds or jobs requiring custom toolchains.
- Vendor lock-in: Workflows written in GitHub Actions syntax are not portable. Moving to GitLab, Gitea, or any other Git host means rewriting every pipeline.
- Limited runner control: GitHub-hosted runners are ephemeral VMs with fixed specs. You cannot mount volumes, access local services, or persist caches across jobs without workarounds.
- Data sovereignty: Every build runs on Microsoft/GitHub infrastructure. For sensitive workloads — proprietary code, secrets injection, artifact signing — this is a hard constraint for many organizations.
- Network constraints: Need to access internal services during CI? GitHub-hosted runners require tunneling or exposing internal endpoints to the public internet.
Evaluating Alternatives
Self-hosted CI/CD is not a new idea. The ecosystem is rich, and choosing the right tool requires weighing several factors:
| Tool | License | Docker-Native | Complexity | GitHub Integration | Active Development |
|---|---|---|---|---|---|
| Jenkins | MIT | Plugin-based | High | Plugin | Yes |
| GitLab CI | MIT (Core) | Yes | Medium-High | Limited | Yes |
| Drone | Source-available | Yes | Low | Yes | Slowed |
| Woodpecker | Apache 2.0 | Yes | Low | Yes | Very Active |
| Concourse | Apache 2.0 | Yes | High | Manual | Moderate |
| Buildkite | Proprietary | Agent-based | Medium | Yes | Yes |
Jenkins was ruled out — the maintenance overhead and plugin ecosystem are a liability for small teams. GitLab CI is excellent but couples tightly with the GitLab platform. Drone was the original frontrunner, but after Harness acquired it, community development stalled and licensing became restrictive. Woodpecker, a community fork of Drone, emerged as the clear choice.
Choosing Woodpecker
What is Woodpecker CI?
Woodpecker CI is an open-source continuous integration engine with a focus on simplicity. It is a community-maintained fork of Drone CI (pre-acquisition) and retains full compatibility with the Drone pipeline syntax while adding significant improvements.
Key Features That Sold Me
- Truly open-source: Apache 2.0 license with no enterprise-gated features. Every feature is available to every user.
- Docker-native pipelines: Every pipeline step runs in an isolated Docker container. No ambient state, no "works on my machine" — if it runs in Docker, it runs in Woodpecker.
- Multi-platform support: Native support for
linux/amd64,linux/arm64, and more. Run ARM builds on ARM hardware without emulation. - Lightweight footprint: The server and agent together consume under 100MB of RAM at idle. Compare that to Jenkins or GitLab Runner.
- Forge integration: Native support for GitHub, Gitea, Forgejo, GitLab, and Bitbucket. Switch forges without rewriting pipelines.
- YAML-based pipeline definitions: Pipelines live alongside your code in
.woodpecker.yml— version-controlled, reviewable, and portable. - Built-in secret management: Secrets are encrypted at rest and injected only into explicitly authorized pipelines.
- Matrix builds: Fan-out across multiple configurations (Go versions, Node versions, OS variants) with a single pipeline definition.

Setting Up Woodpecker on Your Server
Prerequisites
Before we begin, ensure you have:
- A Linux server (VPS or bare metal) with Docker and Docker Compose installed
- A domain name pointing to your server (e.g.,
ci.yourdomain.com) - A reverse proxy (Traefik, Nginx, or Caddy) for TLS termination
- A GitHub OAuth App (for authentication and repository integration)
Minimum hardware requirements:
| Resource | Minimum | Recommended |
|---|---|---|
| CPU | 1 vCPU | 2+ vCPU |
| RAM | 512 MB | 2 GB |
| Disk | 10 GB | 50 GB (for Docker image cache) |
| Network | 10 Mbps | 100 Mbps |
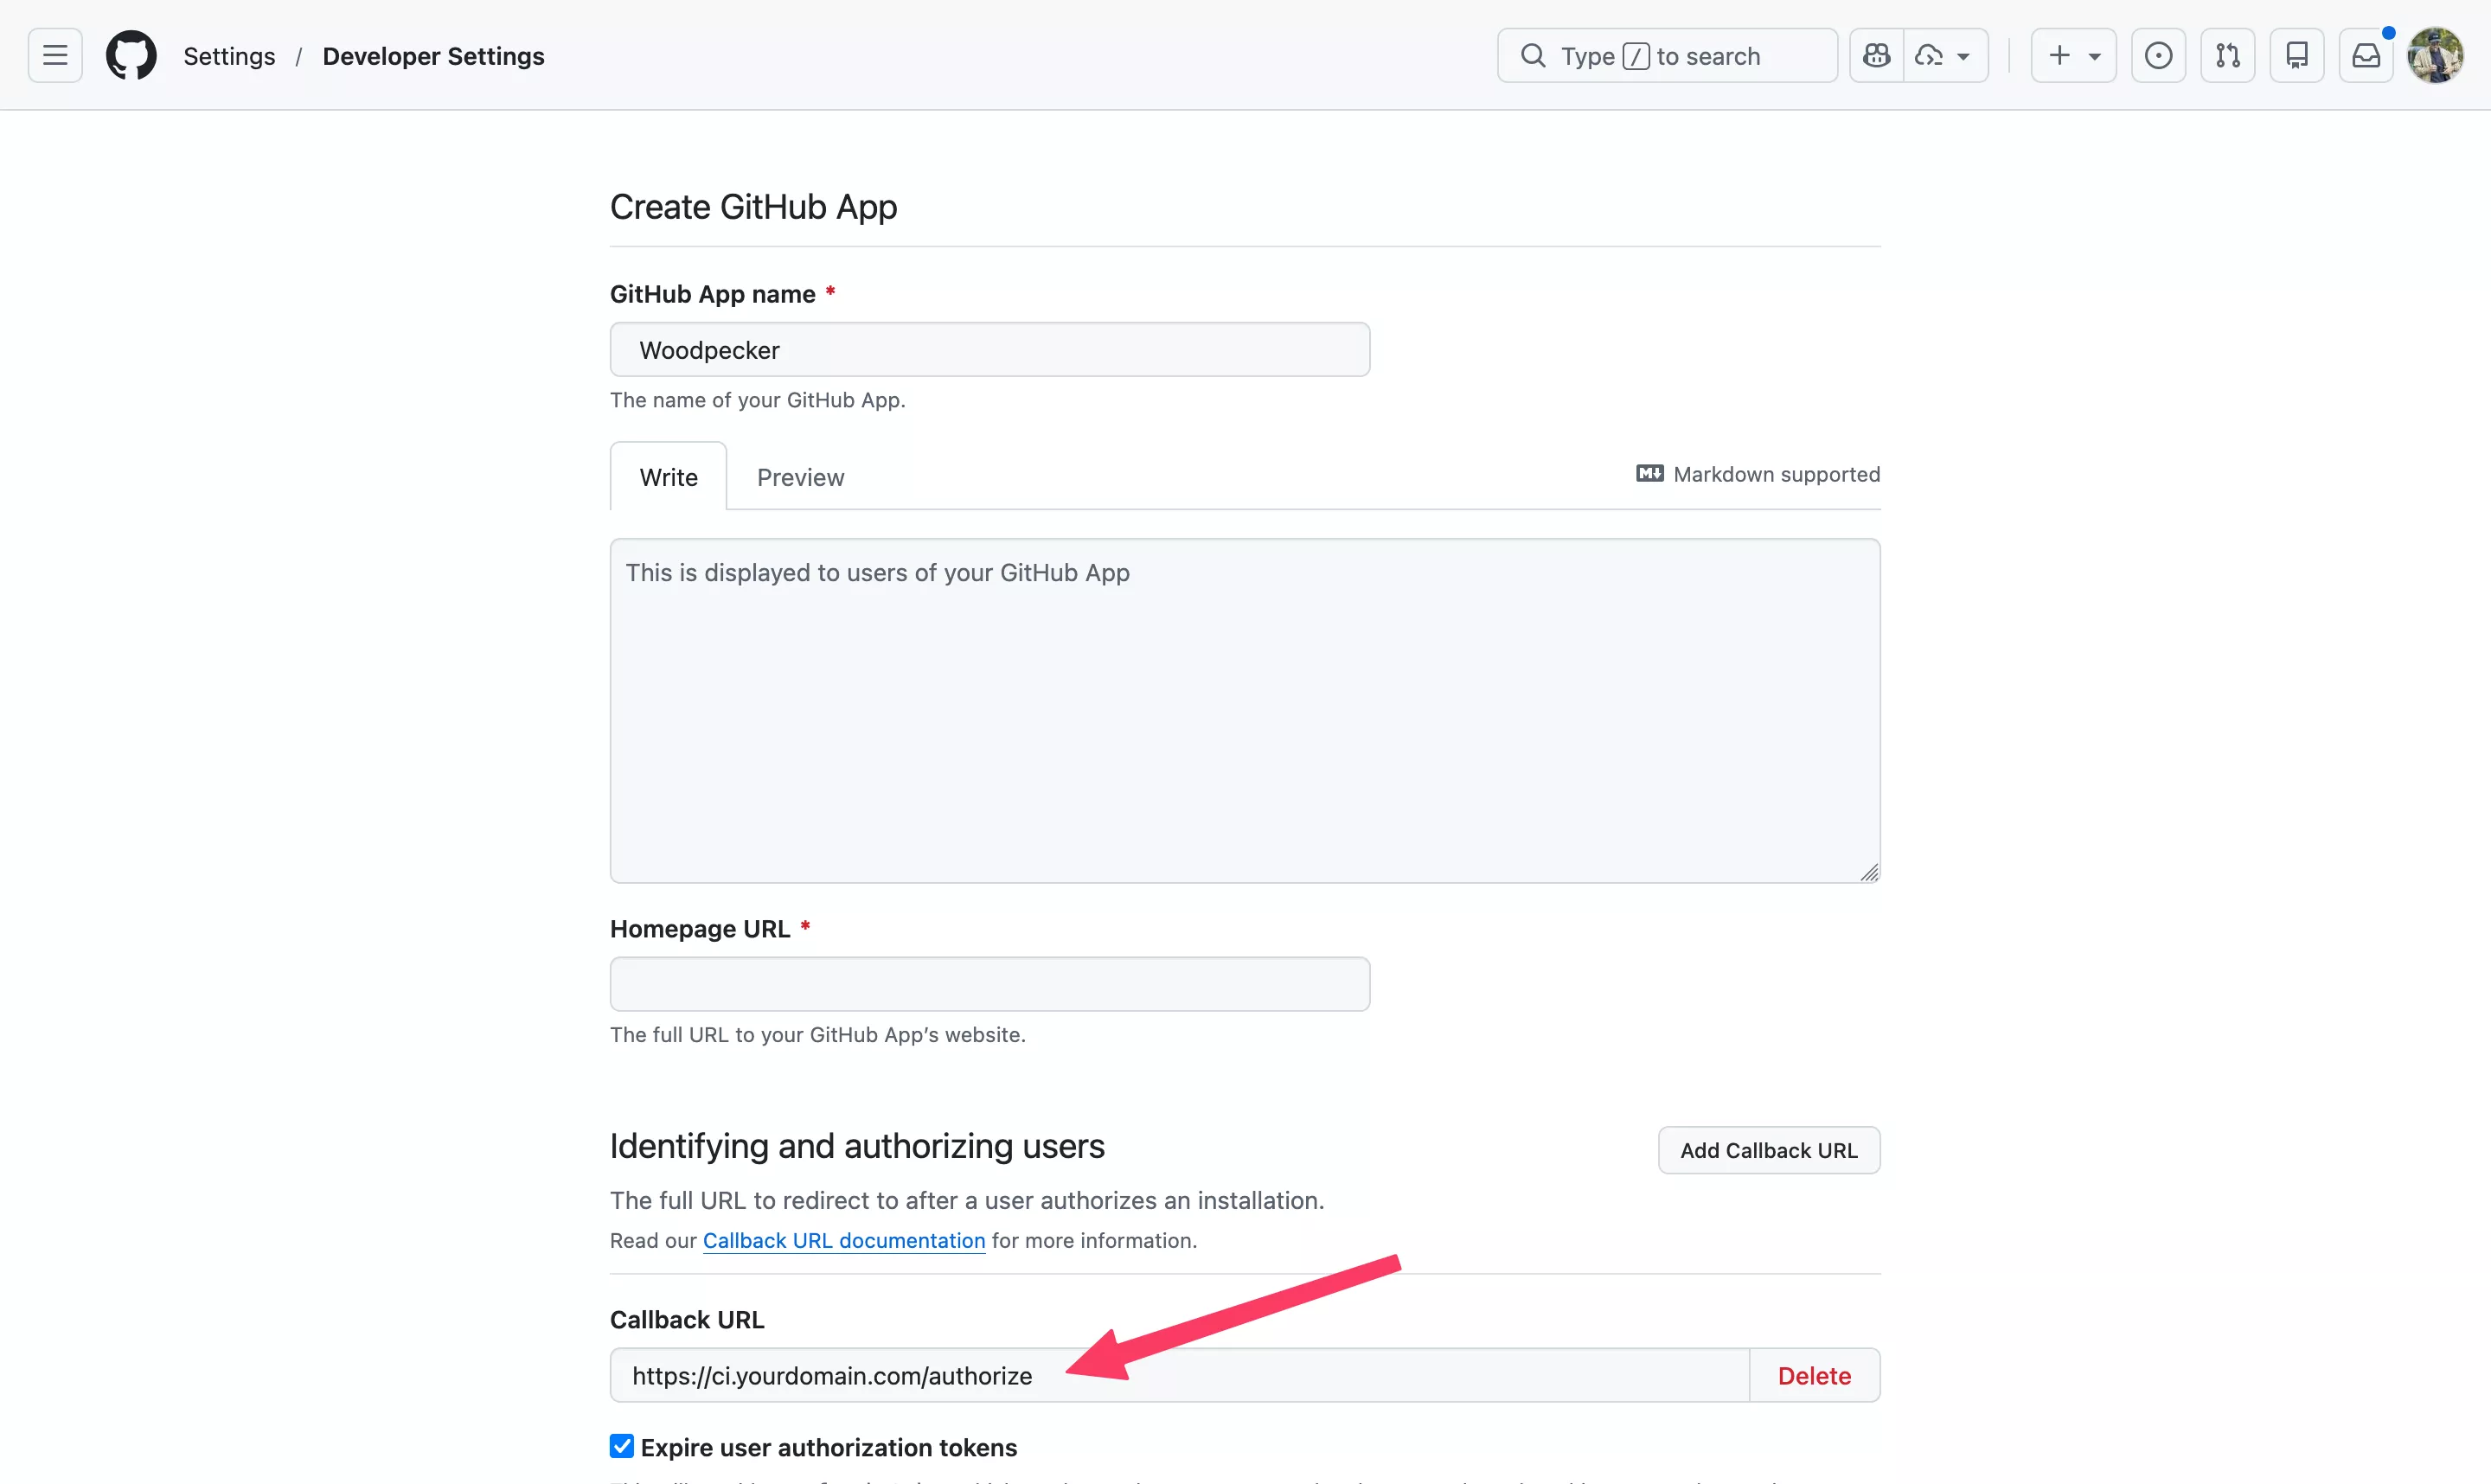
Step 1: Create a GitHub OAuth Application
- Navigate to GitHub → Settings → Developer Settings → OAuth Apps → New OAuth App
- Set the Authorization callback URL to:
https://ci.yourdomain.com/authorize - Note your Client ID and Client Secret
Step 2: Docker Compose Configuration
Create a docker-compose.yml for the Woodpecker stack. This deploys both the server (web UI + API) and the agent (pipeline executor):
# docker-compose.yml
# Woodpecker CI — Self-hosted CI/CD
# Gist: https://gist.github.com/monzim/c4bbe8c0336bff097e0fc5014c09bb51

services:
  woodpecker-server:
    image: woodpeckerci/woodpecker-server:latest
    container_name: woodpecker-server
    restart: unless-stopped
    ports:
      - "8000:8000"
    volumes:
      - woodpecker-server-data:/var/lib/woodpecker/
    environment:
      # Server configuration
      - WOODPECKER_HOST=https://ci.yourdomain.com
      - WOODPECKER_OPEN=true

      # GitHub OAuth integration
      - WOODPECKER_GITHUB=true
      - WOODPECKER_GITHUB_CLIENT=${WOODPECKER_GITHUB_CLIENT}
      - WOODPECKER_GITHUB_SECRET=${WOODPECKER_GITHUB_SECRET}

      # Security
      - WOODPECKER_AGENT_SECRET=${WOODPECKER_AGENT_SECRET}

      # Admin users (GitHub usernames)
      - WOODPECKER_ADMIN=monzim

      # Database (SQLite by default, PostgreSQL for production)
      # - WOODPECKER_DATABASE_DRIVER=postgres
      # - WOODPECKER_DATABASE_DATASOURCE=postgres://user:pass@db:5432/woodpecker?sslmode=disable

      # Logging
      - WOODPECKER_LOG_LEVEL=info

  woodpecker-agent:
    image: woodpeckerci/woodpecker-agent:latest
    container_name: woodpecker-agent
    restart: unless-stopped
    depends_on:
      - woodpecker-server
    volumes:
      - /var/run/docker.sock:/var/run/docker.sock
      - woodpecker-agent-config:/etc/woodpecker
    environment:
      - WOODPECKER_SERVER=woodpecker-server:9000
      - WOODPECKER_AGENT_SECRET=${WOODPECKER_AGENT_SECRET}
      - WOODPECKER_MAX_WORKFLOWS=4
      - WOODPECKER_HEALTHCHECK=true

volumes:
  woodpecker-server-data:
  woodpecker-agent-config:
Step 3: Environment Variables
Create a .env file alongside your Compose file:
# .env
WOODPECKER_GITHUB_CLIENT=your_github_oauth_client_id
WOODPECKER_GITHUB_SECRET=your_github_oauth_client_secret
WOODPECKER_AGENT_SECRET=$(openssl rand -hex 32)
Security note: Never commit
.envfiles to version control. Use a secrets manager or encrypted environment in production.
Step 4: Reverse Proxy Configuration
Here's a minimal Traefik configuration using Docker labels. If you prefer Nginx or Caddy, the core requirement is proxying HTTPS traffic to port 8000:
# Add these labels to the woodpecker-server service
labels:
  - "traefik.enable=true"
  - "traefik.http.routers.woodpecker.rule=Host(`ci.yourdomain.com`)"
  - "traefik.http.routers.woodpecker.entrypoints=websecure"
  - "traefik.http.routers.woodpecker.tls.certresolver=letsencrypt"
  - "traefik.http.services.woodpecker.loadbalancer.server.port=8000"
Alternatively, with Nginx:
server {
    listen 443 ssl http2;
    server_name ci.yourdomain.com;

    ssl_certificate     /etc/letsencrypt/live/ci.yourdomain.com/fullchain.pem;
    ssl_certificate_key /etc/letsencrypt/live/ci.yourdomain.com/privkey.pem;

    location / {
        proxy_pass http://127.0.0.1:8000;
        proxy_set_header Host $host;
        proxy_set_header X-Real-IP $remote_addr;
        proxy_set_header X-Forwarded-For $proxy_add_x_forwarded_for;
        proxy_set_header X-Forwarded-Proto $scheme;

        # WebSocket support (for live log streaming)
        proxy_http_version 1.1;
        proxy_set_header Upgrade $http_upgrade;
        proxy_set_header Connection "upgrade";
    }
}
Step 5: Deploy
# Start the stack
docker compose up -d

# Verify both containers are running
docker compose ps

# Check server logs
docker compose logs -f woodpecker-server

# Check agent logs
docker compose logs -f woodpecker-agent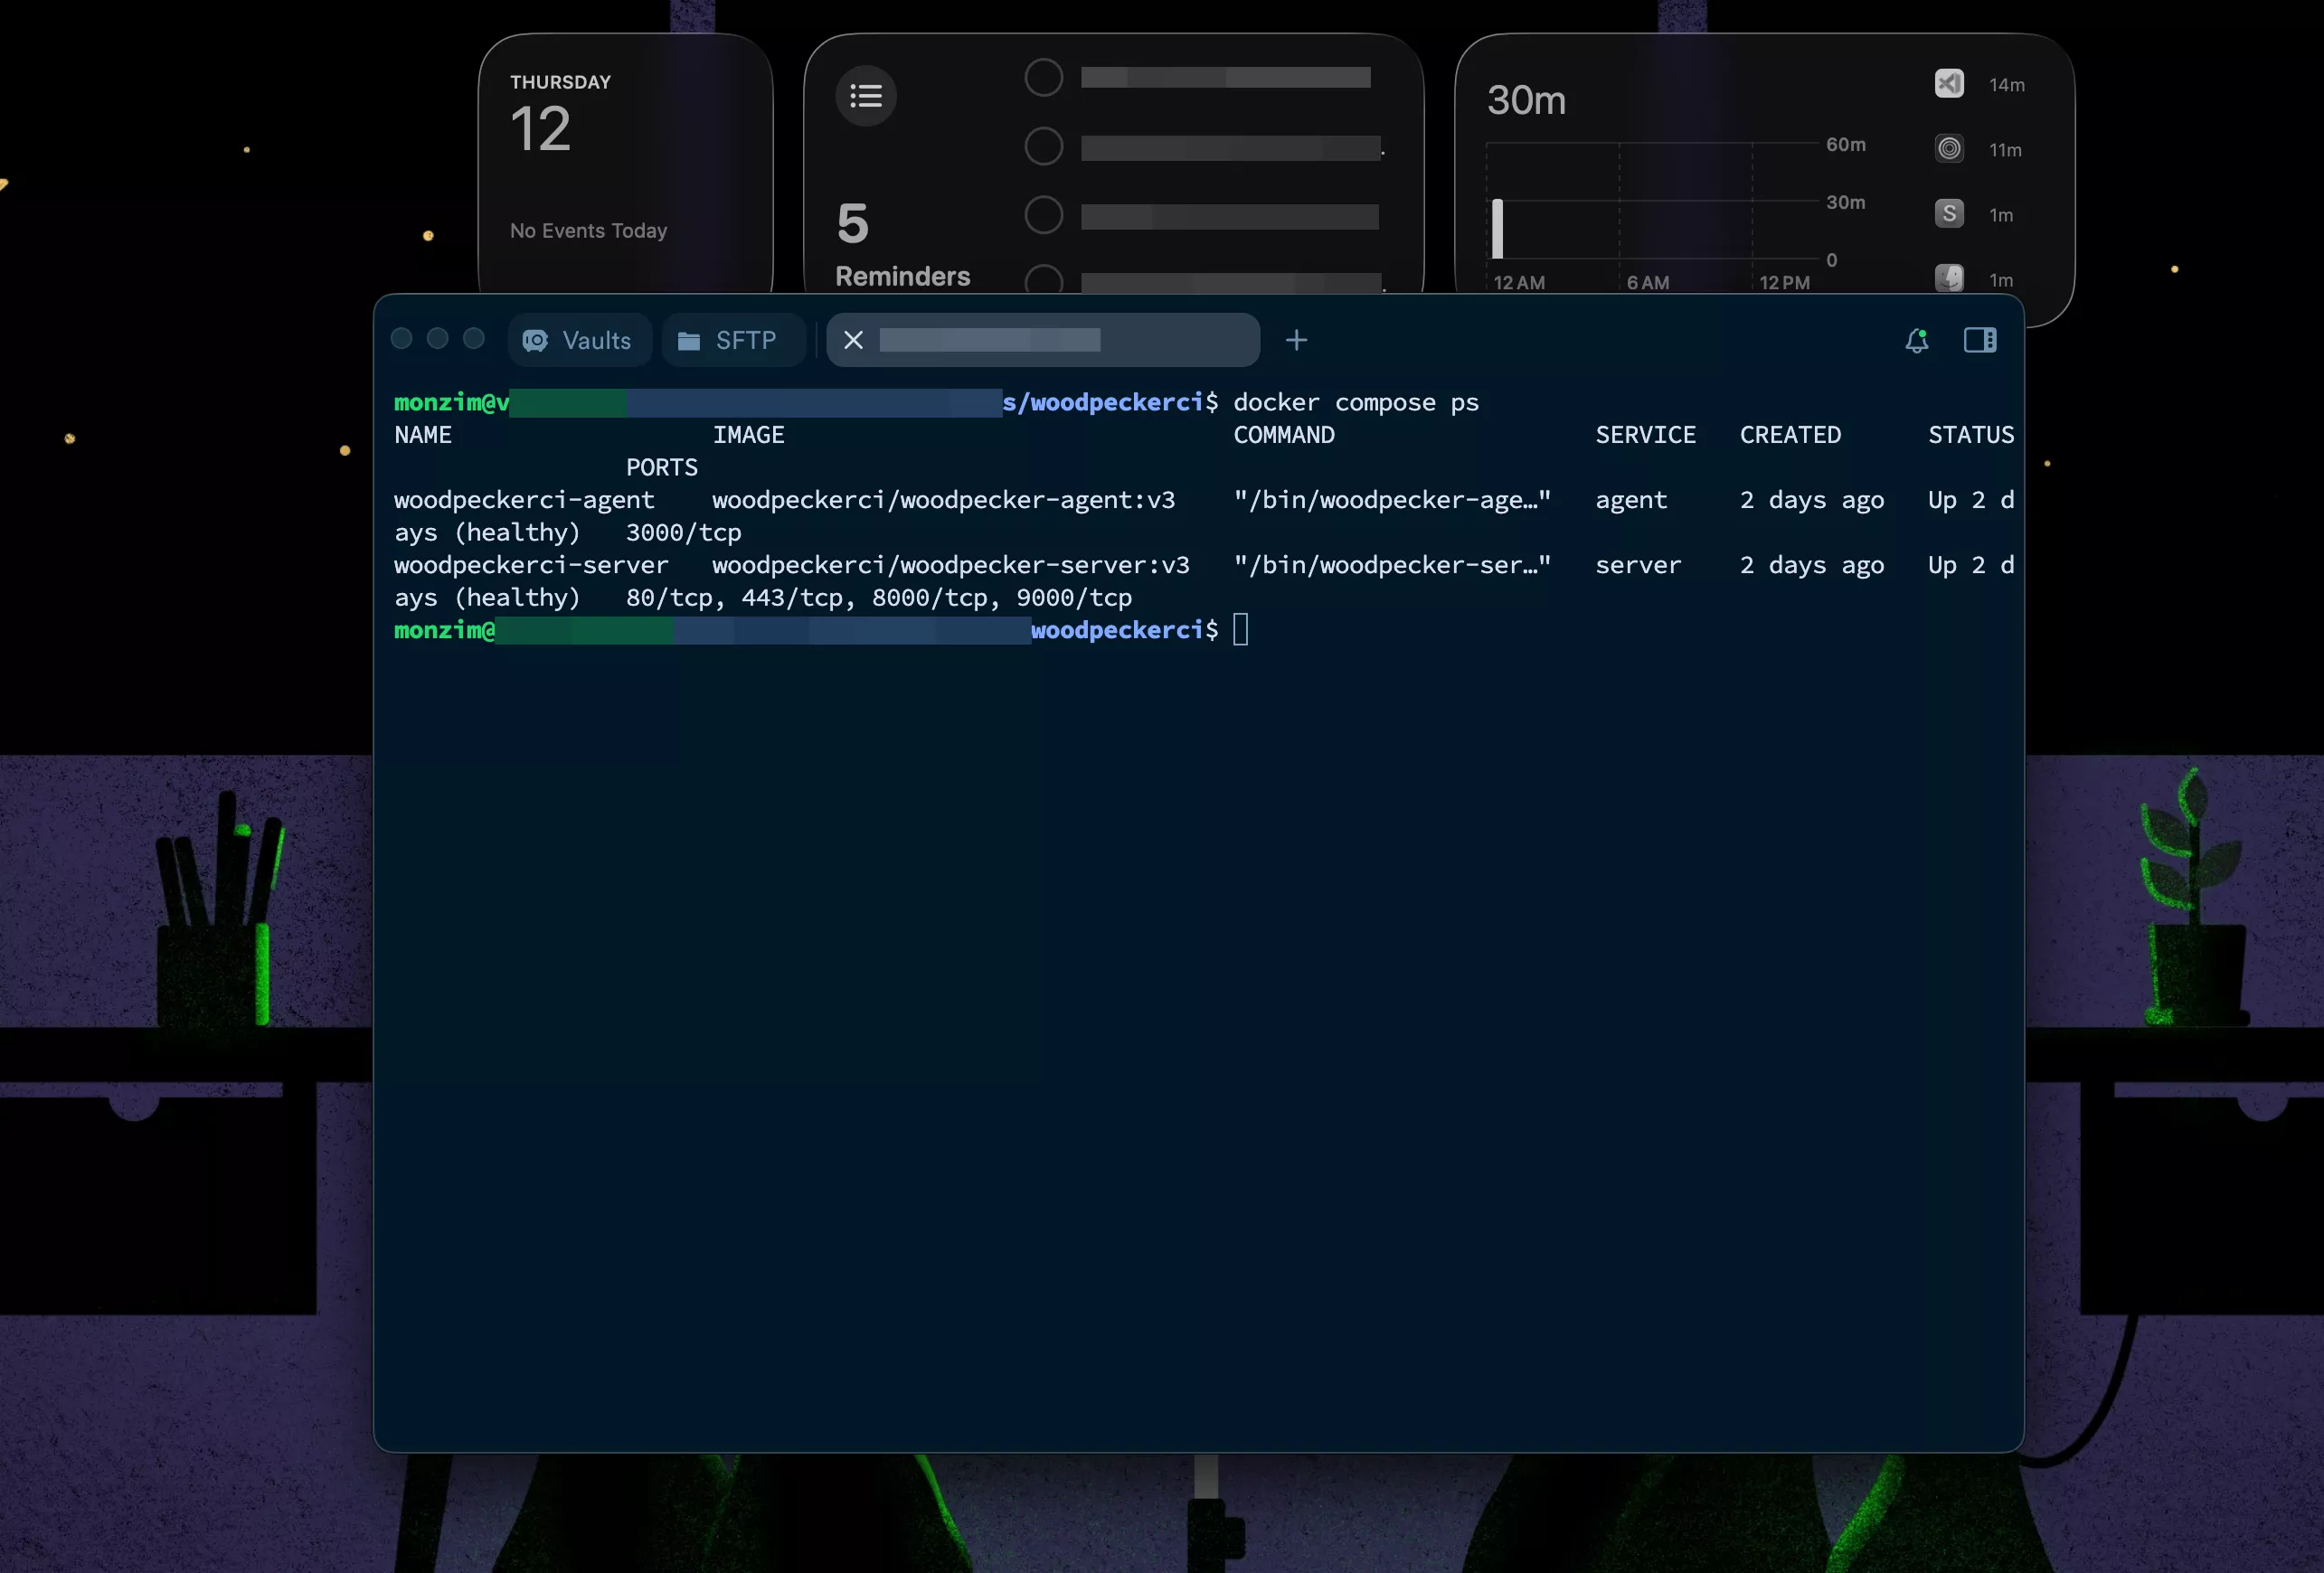
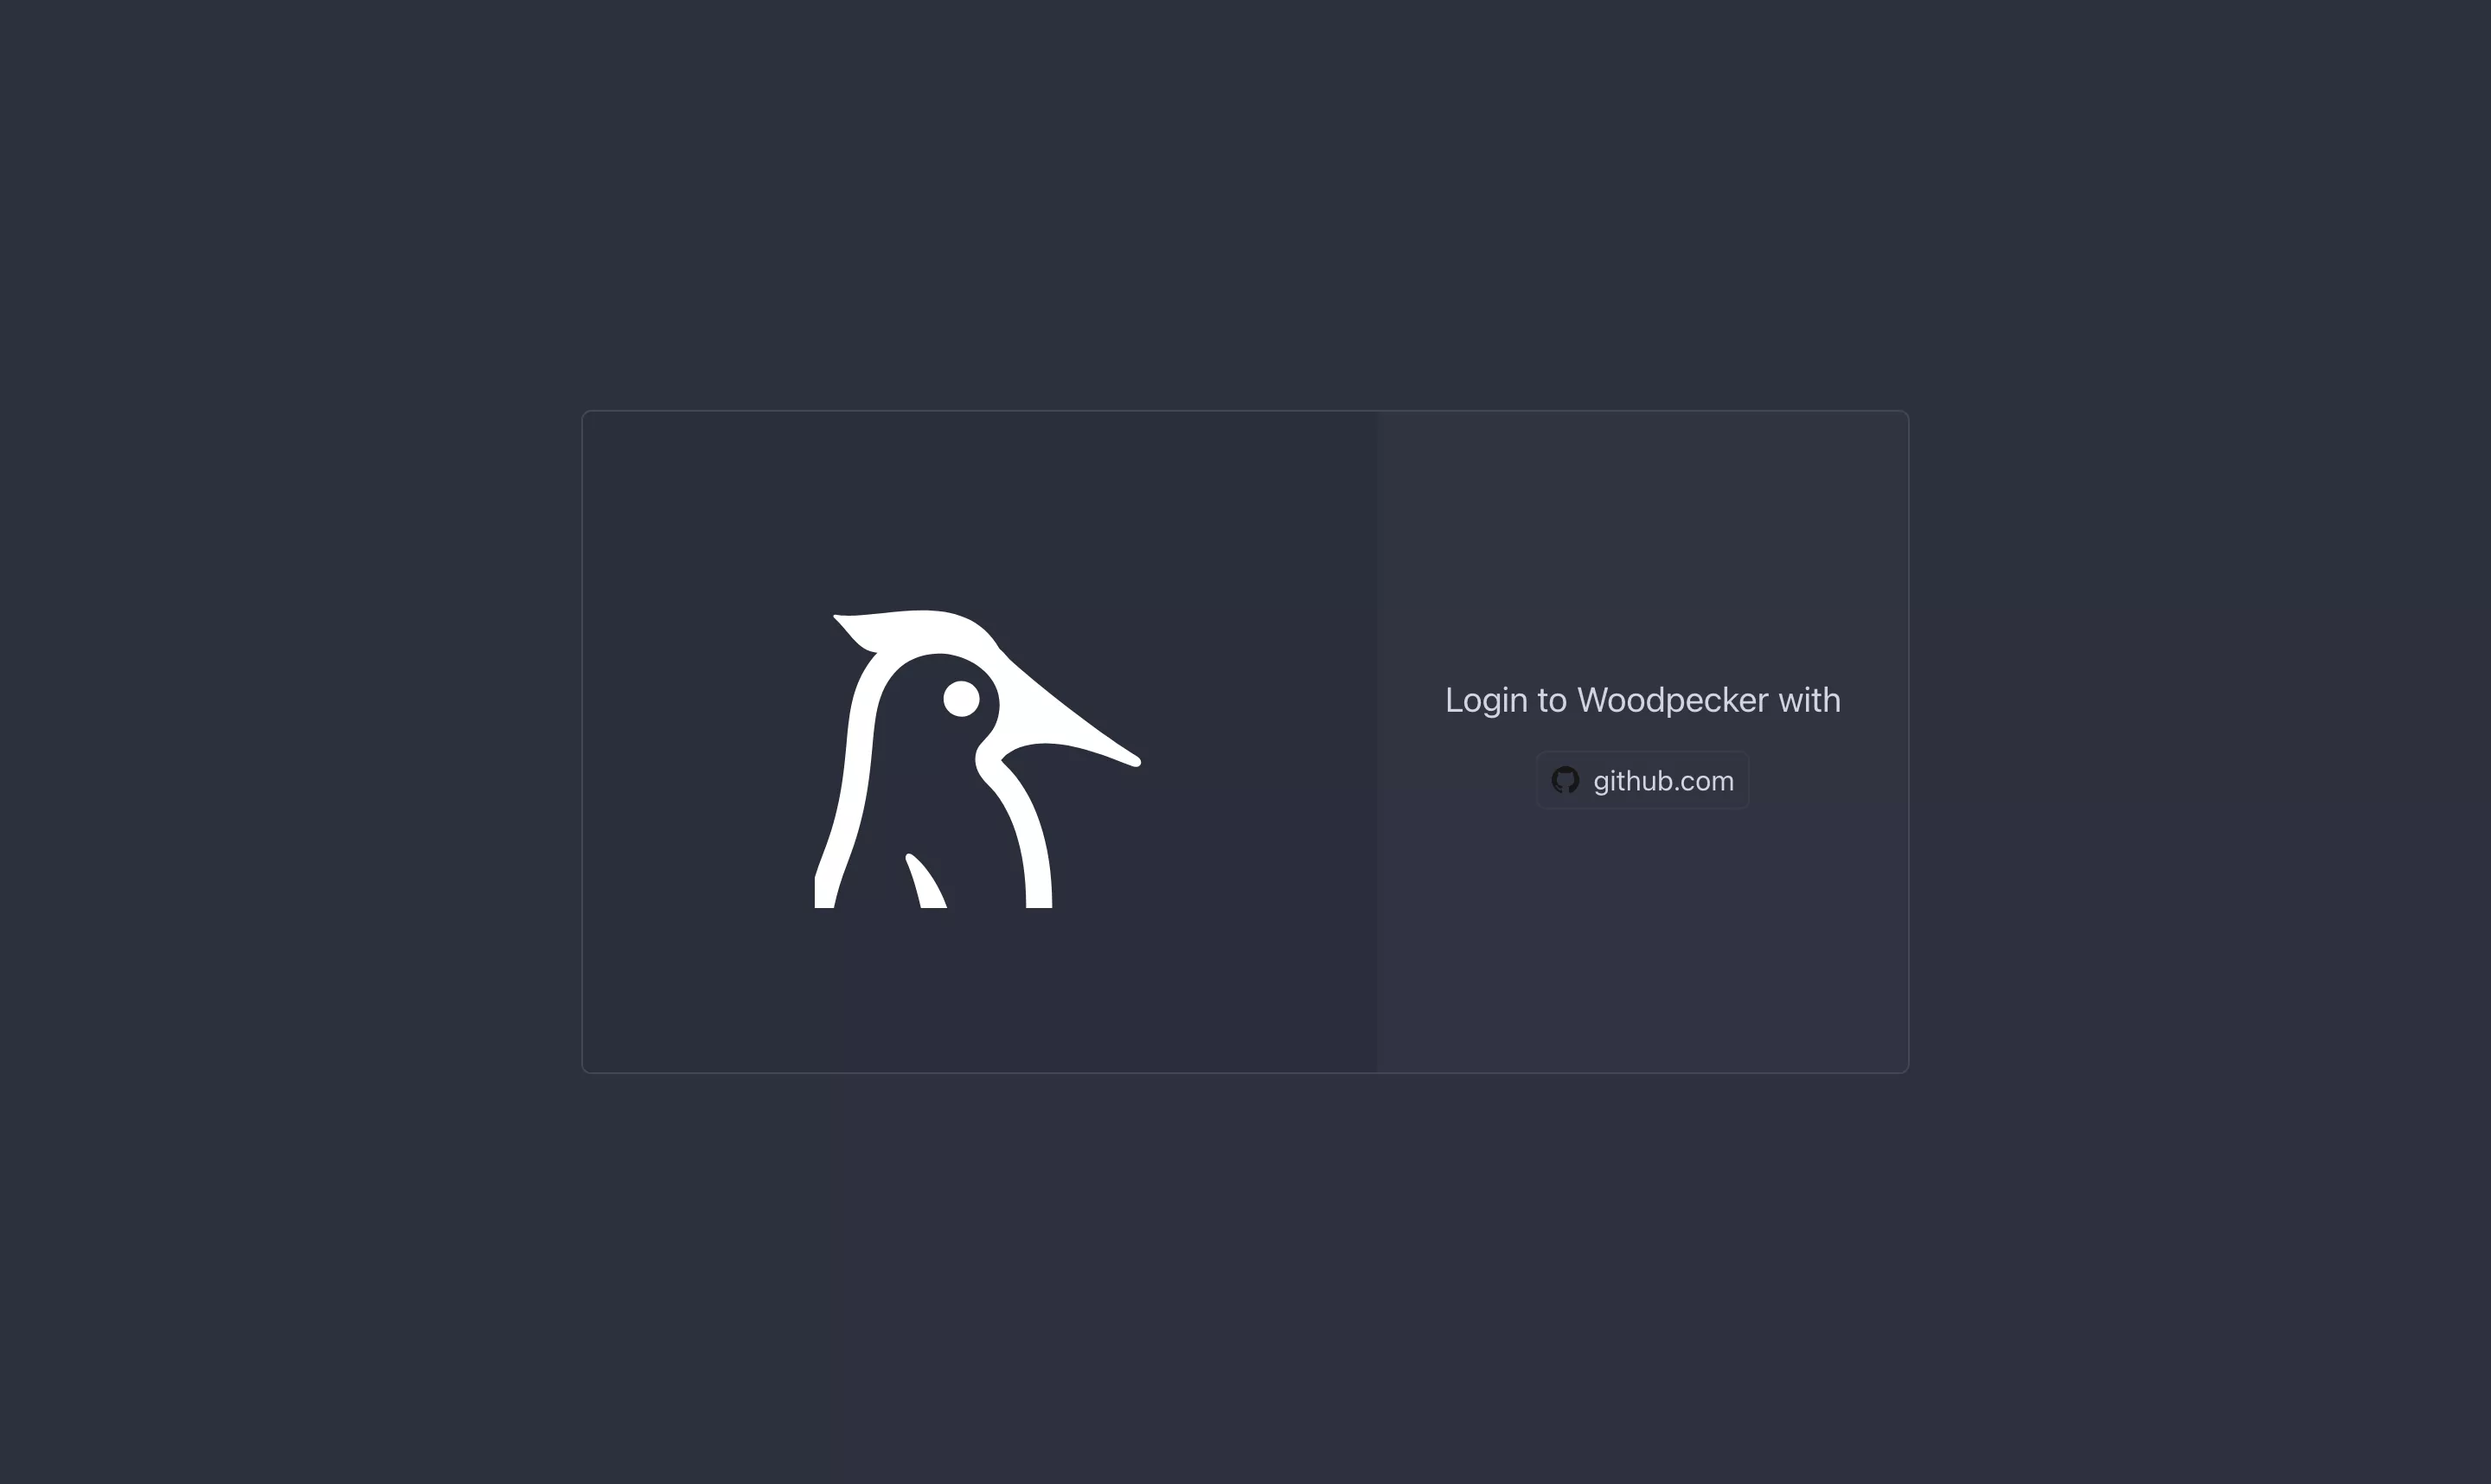
Once the server is running, navigate to https://ci.yourdomain.com and authenticate with your GitHub account. Woodpecker will request permission to access your repositories.
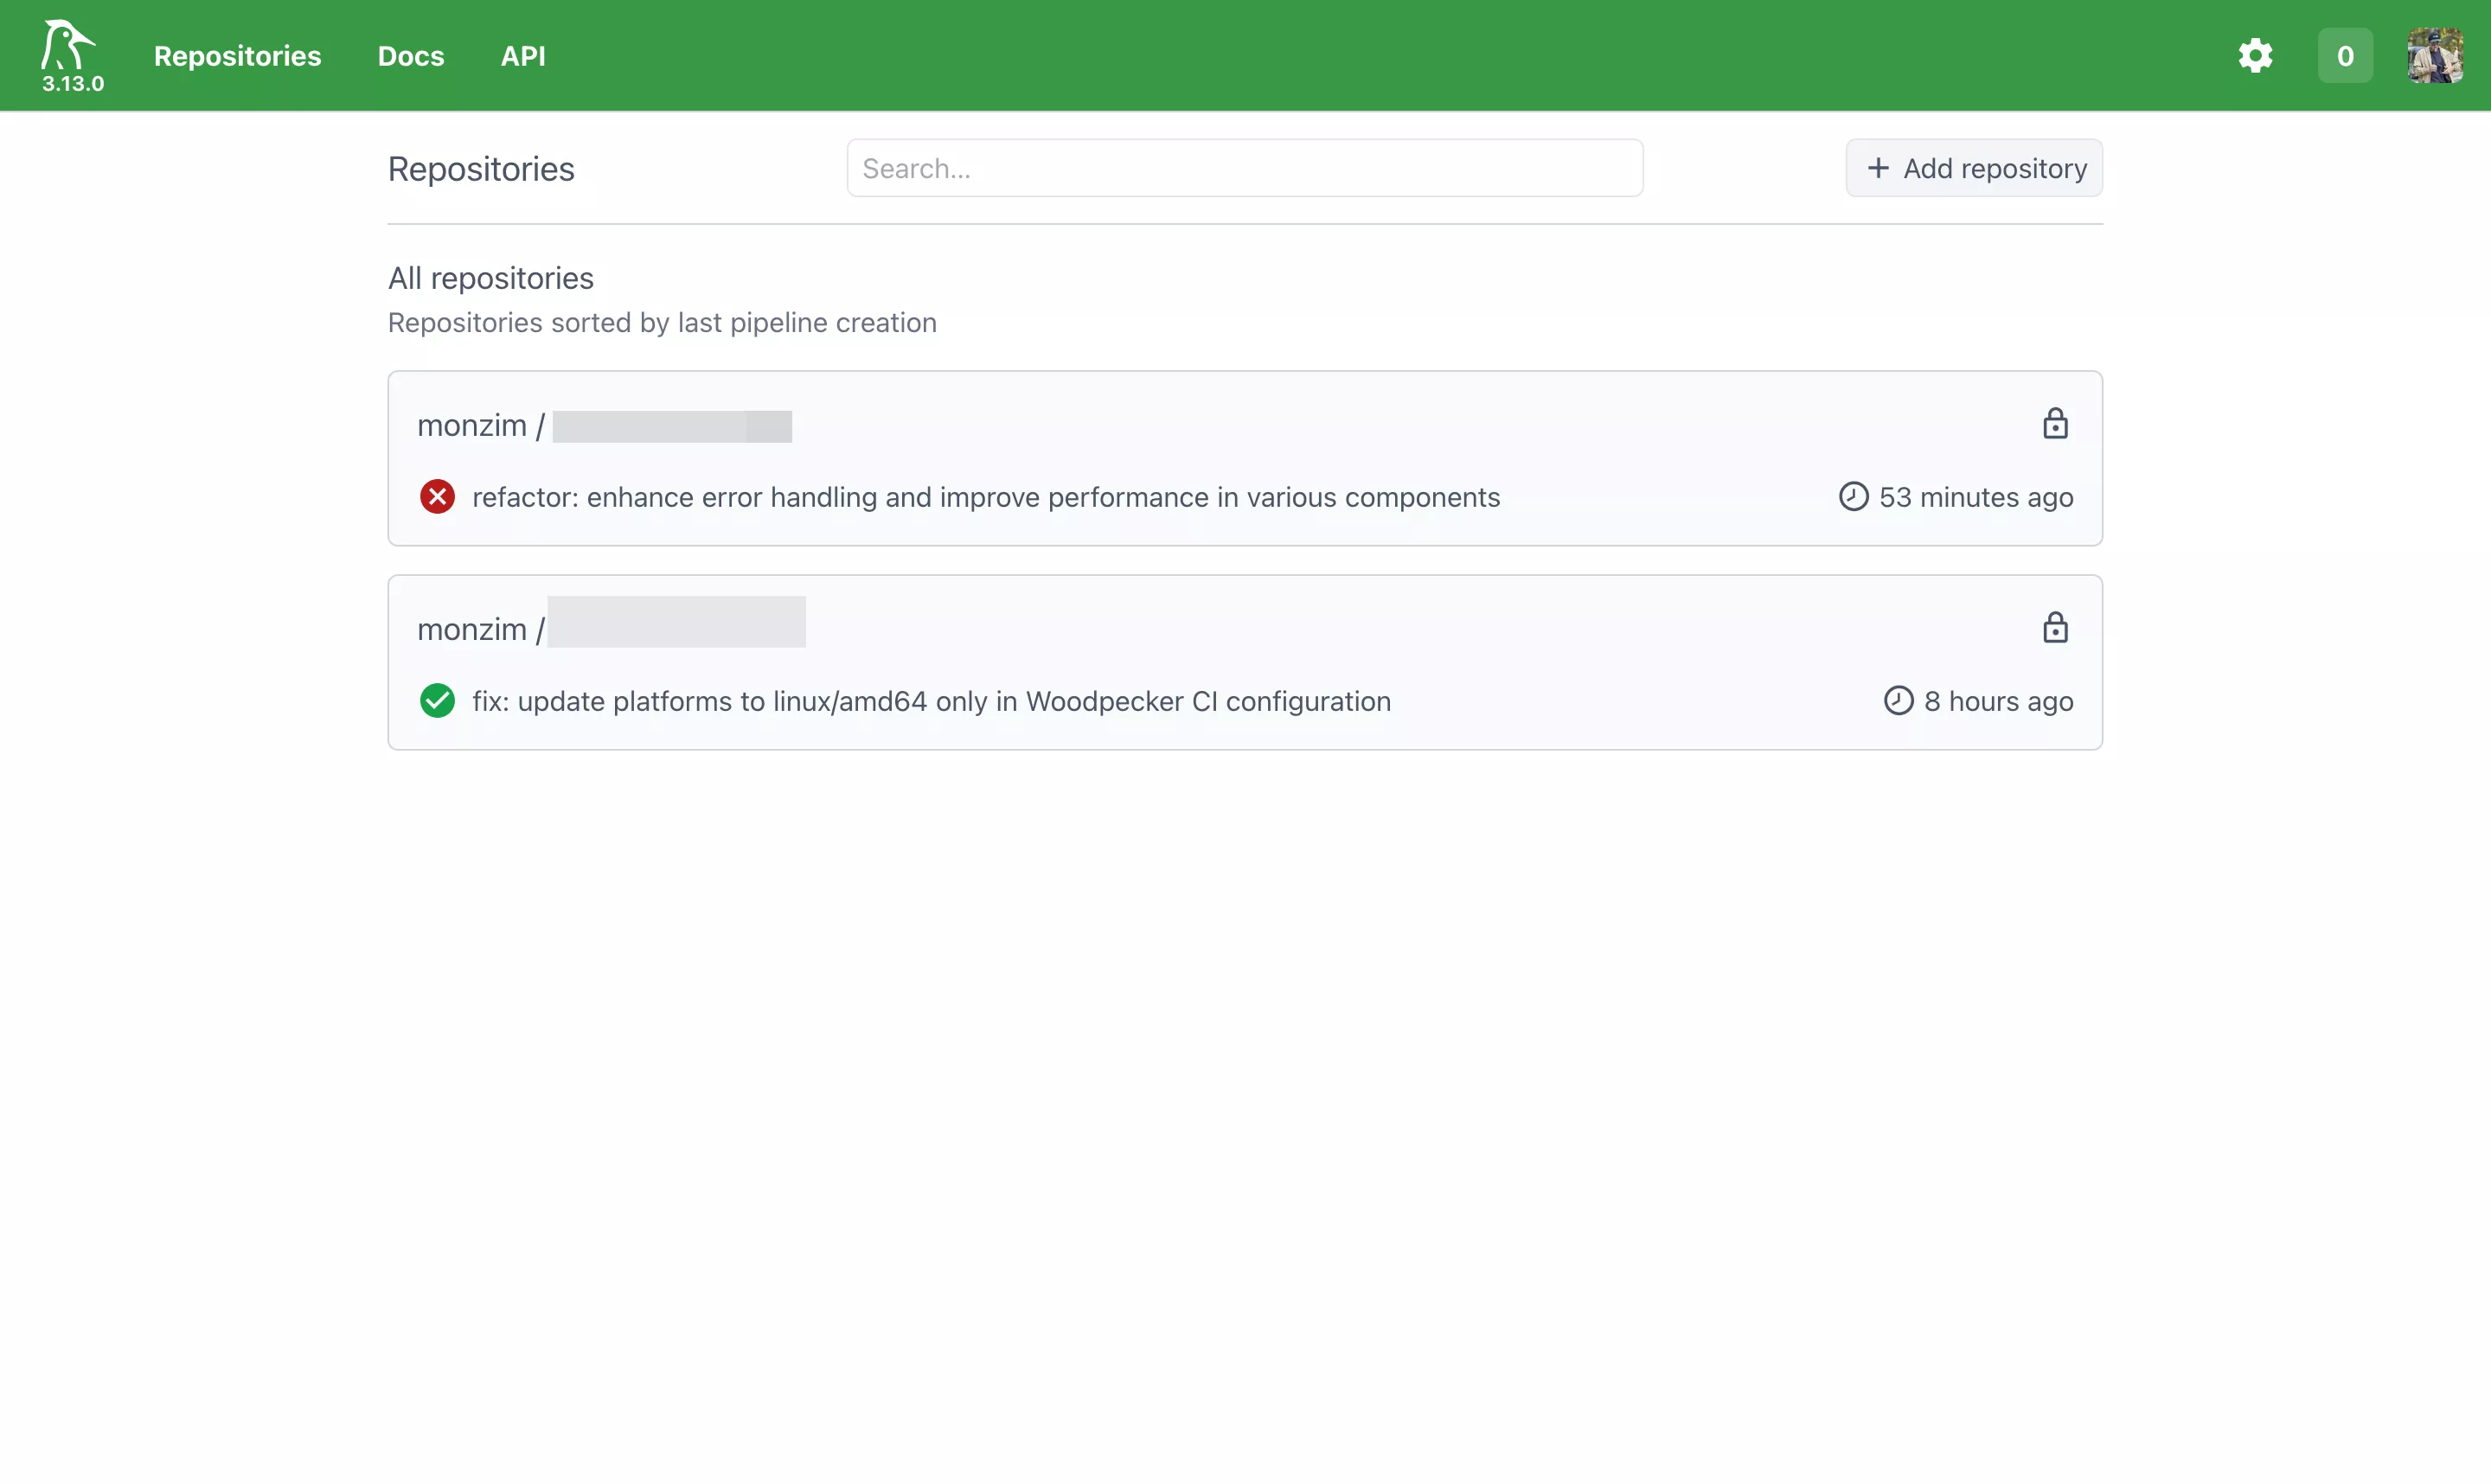
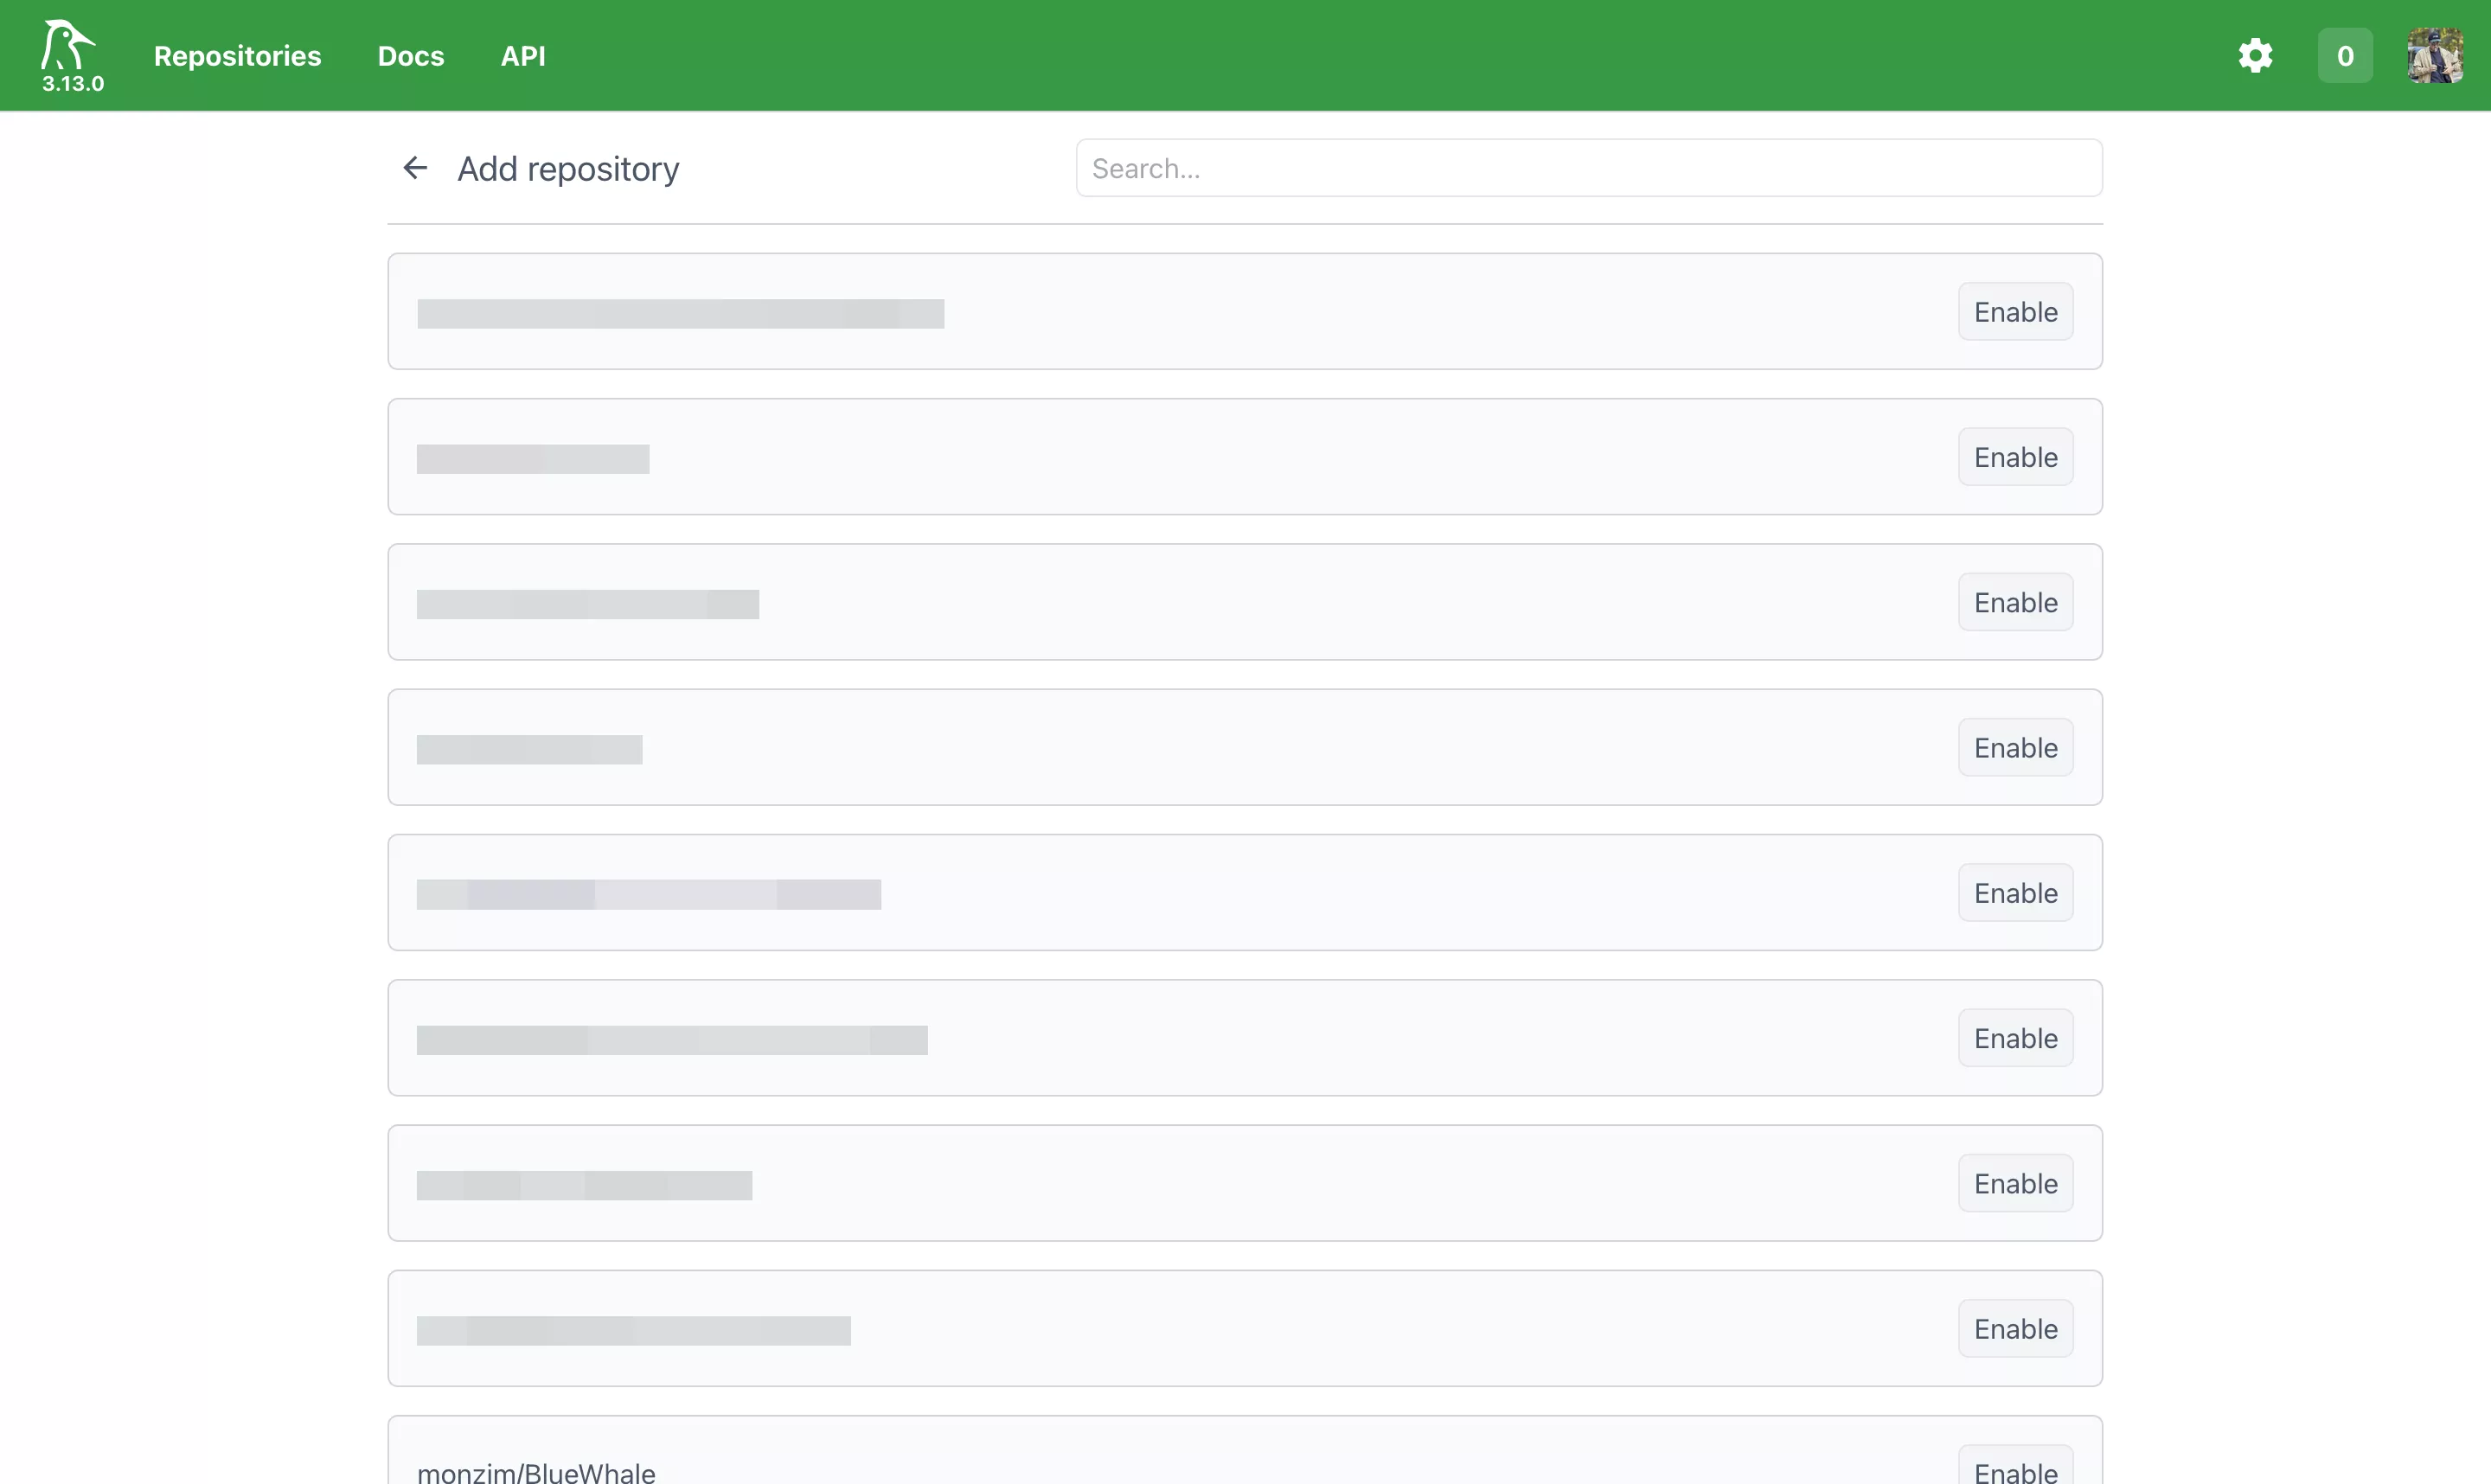
Step 6: Activate Repositories
After authentication, you'll see a list of your GitHub repositories. Toggle the ones you want Woodpecker to monitor. Woodpecker will automatically install a webhook on each activated repository.
Building and Deploying with Docker
This is where Woodpecker shines. Every pipeline step is a Docker container, which means your CI environment is reproducible, isolated, and portable.
Pipeline Basics
Woodpecker looks for a .woodpecker.yml (or .woodpecker/ directory) in your repository root. Here's the anatomy of a pipeline:
# .woodpecker.yml
steps:
  - name: build
    image: node:20-alpine
    commands:
      - npm ci
      - npm run build
      - npm test

  - name: lint
    image: node:20-alpine
    commands:
      - npm ci
      - npm run lint
Each step:
- Runs in a fresh container from the specified
image - Has access to the repository source code (mounted automatically)
- Shares a workspace volume with other steps in the same pipeline
- Fails the pipeline if any command returns a non-zero exit code
Docker Build and Push Workflow
For containerized applications, the most common pipeline builds a Docker image and pushes it to a registry. Woodpecker provides a dedicated plugin for this:
# .woodpecker.yml — Docker build and push
steps:
  - name: test
    image: golang:1.22-alpine
    commands:
      - go test ./...

  - name: build-and-push
    image: woodpeckerci/plugin-docker-buildx
    settings:
      repo: registry.yourdomain.com/myapp
      tags:
        - latest
        - "${CI_COMMIT_SHA:0:8}"
      registry: registry.yourdomain.com
      username:
        from_secret: registry_username
      password:
        from_secret: registry_password
      platforms:
        - linux/amd64
        - linux/arm64
    when:
      branch: main
      event: push
Key points:
- Multi-platform builds: The
platformsfield triggers cross-compilation via Docker Buildx. No emulation setup required — the plugin handles QEMU registration. - Dynamic tags:
${CI_COMMIT_SHA:0:8}tags the image with the short commit hash for traceability. - Conditional execution: The
whenblock ensures this step only runs on pushes tomain, not on pull requests. - Secrets: Registry credentials are injected from Woodpecker's encrypted secret store, never exposed in logs.
Multi-Stage Pipeline with Deploy
Here's a production-grade pipeline that builds, tests, pushes, and deploys:
# .woodpecker.yml — Full CI/CD pipeline

steps:
  # Step 1: Run tests
  - name: test
    image: node:20-alpine
    commands:
      - npm ci --frozen-lockfile
      - npm run test:ci
      - npm run lint

  # Step 2: Build Docker image and push to registry
  - name: build-and-push
    image: woodpeckerci/plugin-docker-buildx
    settings:
      repo: ghcr.io/monzim/myapp
      tags:
        - latest
        - "${CI_COMMIT_SHA:0:8}"
        - "${CI_COMMIT_BRANCH}"
      registry: ghcr.io
      username:
        from_secret: ghcr_username
      password:
        from_secret: ghcr_token
    when:
      branch: main
      event: push

  # Step 3: Deploy to production via SSH
  - name: deploy
    image: appleboy/drone-ssh
    settings:
      host:
        from_secret: deploy_host
      username:
        from_secret: deploy_user
      key:
        from_secret: deploy_ssh_key
      script:
        - cd /opt/myapp
        - docker compose pull
        - docker compose up -d --remove-orphans
        - docker image prune -f
    when:
      branch: main
      event: push

  # Step 4: Notify on failure
  - name: notify-failure
    image: plugins/webhook
    settings:
      urls:
        from_secret: discord_webhook
      content_type: application/json
      template: |
        {
          "content": "❌ Pipeline failed for **{{ repo.name }}** on branch `{{ build.branch }}`\nCommit: {{ build.message }}\nLink: {{ build.link }}"
        }
    when:
      status: failure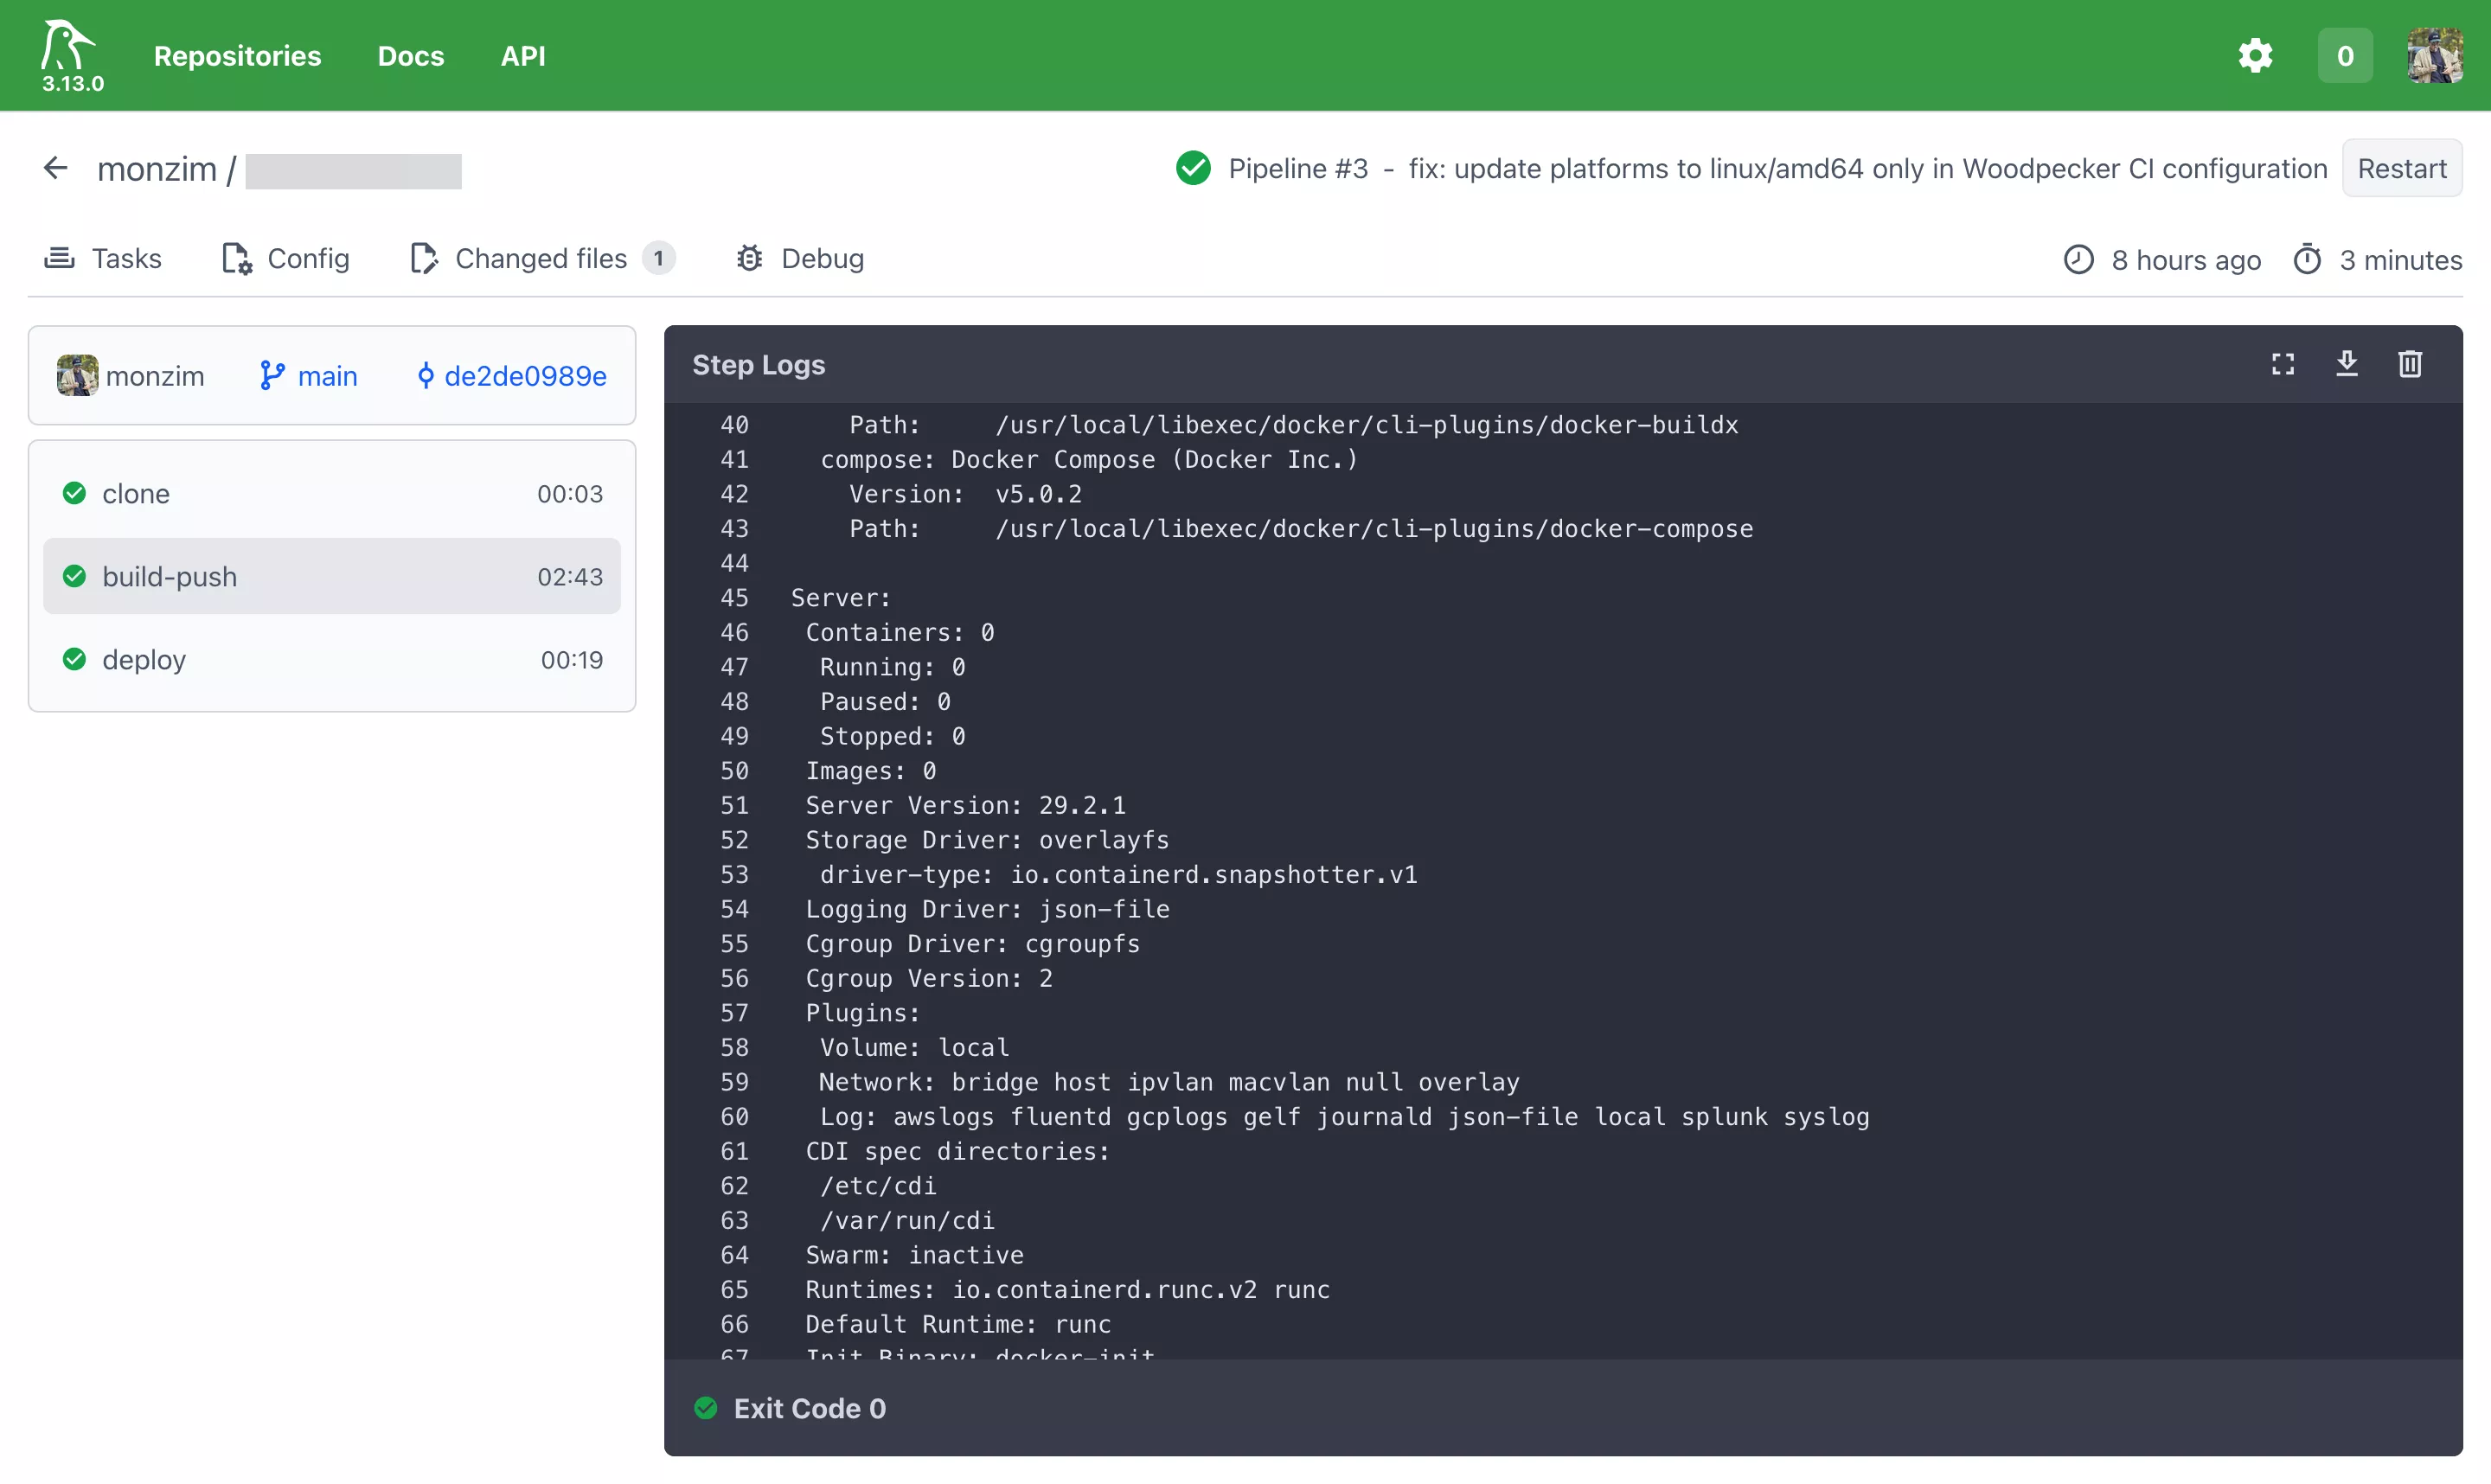
Matrix Builds
Need to test across multiple versions? Woodpecker supports matrix expansion:
# .woodpecker.yml — Matrix build
matrix:
  GO_VERSION:
    - "1.21"
    - "1.22"
    - "1.23"
  DATABASE:
    - postgres
    - sqlite

steps:
  - name: test
    image: golang:${GO_VERSION}-alpine
    commands:
      - go test -v ./... -tags ${DATABASE}
This generates 6 pipeline runs (3 Go versions × 2 databases), all executed in parallel if agents are available.
Integration with Docker Compose for Local Testing
One advantage of Woodpecker's Docker-native approach is that your CI environment mirrors your local development environment. If you use Docker Compose locally, the same images run in CI:
# .woodpecker.yml — Using services (like docker-compose)
services:
  - name: postgres
    image: postgres:16-alpine
    environment:
      POSTGRES_DB: testdb
      POSTGRES_USER: testuser
      POSTGRES_PASSWORD: testpass

  - name: redis
    image: redis:7-alpine

steps:
  - name: integration-test
    image: node:20-alpine
    environment:
      DATABASE_URL: postgres://testuser:testpass@postgres:5432/testdb
      REDIS_URL: redis://redis:6379
    commands:
      - npm ci
      - npm run test:integration
The services block spins up sidecar containers that are network-accessible by name from your pipeline steps — identical to Docker Compose service networking.
Best Practices for Platform Engineers
Security Considerations
Secrets Management
Woodpecker stores secrets encrypted at rest. Never hardcode credentials in pipeline files:
# ❌ Never do this
steps:
  - name: deploy
    image: alpine
    commands:
      - echo "password123" | docker login registry.example.com -u admin --password-stdin

# ✅ Use Woodpecker secrets
steps:
  - name: deploy
    image: alpine
    commands:
      - echo "$REGISTRY_PASSWORD" | docker login registry.example.com -u "$REGISTRY_USER" --password-stdin
    secrets:
      - registry_user
      - registry_password
Secrets can be scoped to:
- Repository level: Available only to a specific repo
- Organization level: Shared across all repos in an org
- Pipeline events: Restrict secrets to
pushevents only (notpull_request) to prevent exposure in fork PRs
Network Isolation
The Woodpecker agent requires access to the Docker socket. In production, isolate it:
# docker-compose.yml — Hardened agent
woodpecker-agent:
  image: woodpeckerci/woodpecker-agent:latest
  security_opt:
    - no-new-privileges:true
  volumes:
    - /var/run/docker.sock:/var/run/docker.sock:ro
  networks:
    - ci-internal
  deploy:
    resources:
      limits:
        cpus: "2.0"
        memory: 2G
Consider running the agent in a dedicated VM or using Docker-in-Docker (DinD) to avoid exposing the host Docker socket entirely.
Docker Socket Security
Mounting the Docker socket gives the agent root-equivalent access to the host. Mitigations:
- Use rootless Docker where possible
- Limit agent permissions with
userns-remap - Run agents on dedicated CI hosts — not on production servers
- Audit container images used in pipelines — only allow trusted base images
Scaling and High Availability
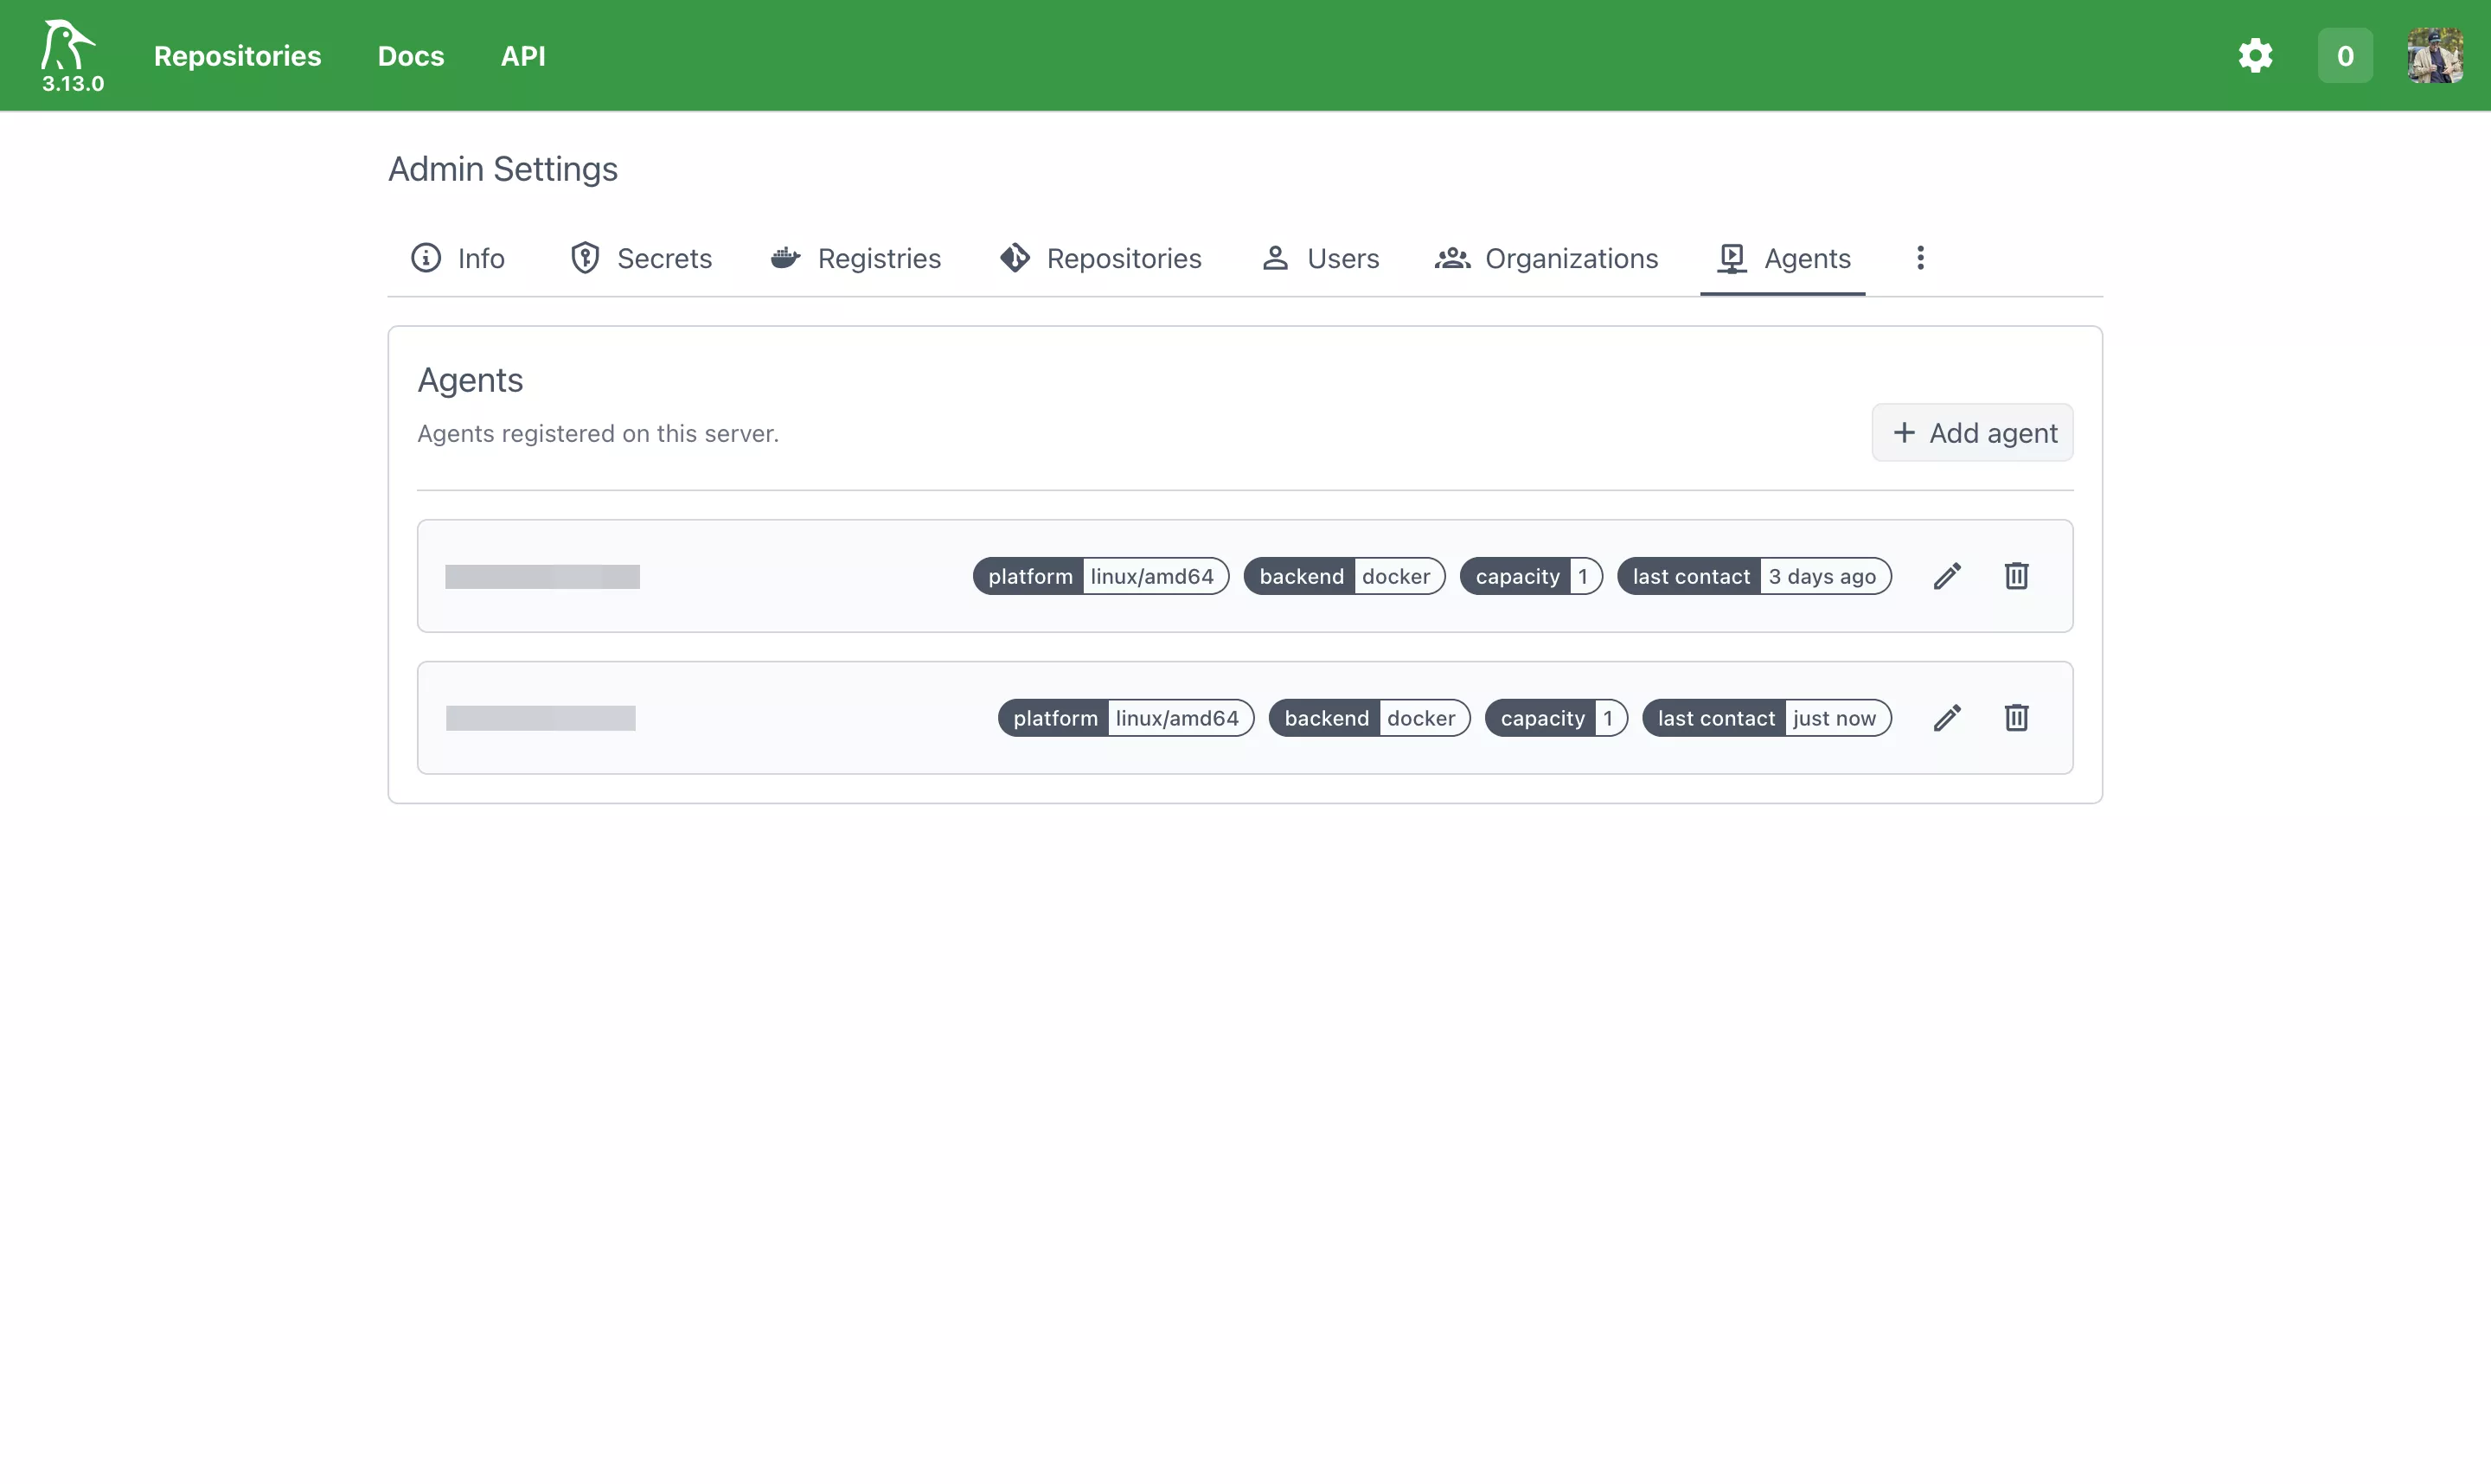
Horizontal Scaling with Multiple Agents
Woodpecker separates the server (coordination) from agents (execution). Scale by adding agents:
# docker-compose.yml — Multi-agent setup
services:
  woodpecker-server:
    image: woodpeckerci/woodpecker-server:latest
    # ... server config ...

  agent-1:
    image: woodpeckerci/woodpecker-agent:latest
    environment:
      - WOODPECKER_SERVER=woodpecker-server:9000
      - WOODPECKER_AGENT_SECRET=${WOODPECKER_AGENT_SECRET}
      - WOODPECKER_MAX_WORKFLOWS=4
      - WOODPECKER_FILTER_LABELS=platform=linux/amd64
    volumes:
      - /var/run/docker.sock:/var/run/docker.sock

  agent-2-arm:
    image: woodpeckerci/woodpecker-agent:latest
    environment:
      - WOODPECKER_SERVER=woodpecker-server:9000
      - WOODPECKER_AGENT_SECRET=${WOODPECKER_AGENT_SECRET}
      - WOODPECKER_MAX_WORKFLOWS=2
      - WOODPECKER_FILTER_LABELS=platform=linux/arm64
    volumes:
      - /var/run/docker.sock:/var/run/docker.sock
Agent labels allow you to route workloads to specific hardware — ARM builds to ARM agents, GPU workloads to GPU-equipped hosts.
Database for Production
SQLite is fine for small setups. For HA, switch to PostgreSQL:
environment:
  - WOODPECKER_DATABASE_DRIVER=postgres
  - WOODPECKER_DATABASE_DATASOURCE=postgres://woodpecker:secret@db:5432/woodpecker?sslmode=require
Server Redundancy
For true HA, run multiple server instances behind a load balancer with a shared PostgreSQL database. The Woodpecker server is stateless — all state lives in the database.
Monitoring and Logging Integration
Prometheus Metrics
Woodpecker exposes a /metrics endpoint for Prometheus scraping:
# prometheus.yml
scrape_configs:
  - job_name: "woodpecker"
    static_configs:
      - targets: ["woodpecker-server:8000"]
    metrics_path: /metrics
Key metrics to monitor:
woodpecker_pipeline_count— Total pipeline executionswoodpecker_pipeline_time— Pipeline duration histogramswoodpecker_running_jobs— Currently executing jobswoodpecker_pending_jobs— Queued jobs waiting for agentswoodpecker_worker_count— Connected agents
Grafana Dashboard
Pair Prometheus with Grafana for visualization. The community provides pre-built dashboards, or build your own tracking:
- Pipeline success/failure rates over time
- Average build duration per repository
- Agent utilization and capacity
- Queue depth trends
Structured Logging
Forward Woodpecker logs to your centralized logging stack (ELK, Loki, etc.):
woodpecker-server:
  logging:
    driver: "json-file"
    options:
      max-size: "10m"
      max-file: "3"
      tag: "woodpecker-server"
Or use Loki with the Docker plugin for zero-config log aggregation:
woodpecker-server:
  logging:
    driver: loki
    options:
      loki-url: "http://loki:3100/loki/api/v1/push"
      loki-batch-size: "400"
Migrating Pipelines from GitHub Actions
If you have existing GitHub Actions workflows, migrating to Woodpecker is straightforward. Here's a side-by-side comparison:
GitHub Actions vs. Woodpecker Syntax
GitHub Actions:
# .github/workflows/ci.yml
name: CI
on:
  push:
    branches: [main]
  pull_request:
    branches: [main]

jobs:
  build:
    runs-on: ubuntu-latest
    steps:
      - uses: actions/checkout@v4
      - uses: actions/setup-node@v4
        with:
          node-version: "20"
      - run: npm ci
      - run: npm test
      - run: npm run build
Woodpecker equivalent:
# .woodpecker.yml
steps:
  - name: build
    image: node:20-alpine
    commands:
      - npm ci
      - npm test
      - npm run build

when:
  branch: main
  event: [push, pull_request]
Notable differences:
- No checkout step: Woodpecker automatically clones the repository
- No setup steps: The Docker image provides the runtime —
node:20-alpinealready has Node.js 20 - Simpler syntax: No jobs/steps nesting, no
runs-on, no marketplace actions - Faster startup: No VM provisioning — containers start in seconds
Common Migration Patterns
| GitHub Actions Pattern | Woodpecker Equivalent |
|---|---|
actions/checkout@v4 | Automatic (built-in) |
actions/setup-node@v4 | Use <code>node:20-alpine</code> image |
actions/cache@v4 | Volume mounts or registry cache |
docker/build-push-action@v5 | woodpeckerci/plugin-docker-buildx |
appleboy/ssh-action@v1 |
|
actions/upload-artifact@v4 | S3/MinIO plugin or volume mounts |
| Job matrix |
|
secrets.GITHUB_TOKEN | from_secret: github_token |
Pros and Cons of Self-Hosted Woodpecker
Advantages
- Full infrastructure control: You own the hardware, the network, the data. No third-party has access to your source code or build artifacts.
- Cost efficiency at scale: A $20/month VPS can run hundreds of pipelines daily. At equivalent GitHub Actions usage, you'd pay significantly more.
- Docker-native simplicity: If your team already thinks in containers, Woodpecker feels natural. No proprietary abstractions.
- Portability: Pipelines are forge-agnostic. Switch from GitHub to Gitea tomorrow — same
.woodpecker.ymlworks. - Low resource footprint: Unlike Jenkins or GitLab Runner, Woodpecker idles at under 100MB RAM. It earns its keep on small servers.
- Sub-second pipeline starts: No waiting for VM provisioning. Containers start almost instantly, especially with cached images.
- Transparent and auditable: Open-source codebase. You can inspect, patch, and contribute back. No black-box runner behavior.
Challenges
- You own the uptime: Self-hosting means you're the SRE. Server goes down? Pipelines stop. Plan for monitoring and alerting.
- Initial setup complexity: Setting up TLS, OAuth, reverse proxy, and Docker networking requires systems knowledge. It is not a one-click install.
- Smaller plugin ecosystem: GitHub Actions has thousands of marketplace actions. Woodpecker's plugin ecosystem is smaller, though Drone plugins are compatible.
- No built-in UI for secrets rotation: Secret management works but lacks the polish of GitHub's UI. Consider integrating with Vault for production secrets.
- Manual updates: You're responsible for keeping Woodpecker, Docker, and the host OS updated and patched.
- Limited enterprise features: No built-in RBAC beyond admin/user, no audit logging out of the box. Fine for small teams, potentially limiting for large organizations.
Cost Comparison
| Metric | GitHub Actions (Team) | Self-Hosted Woodpecker |
|---|---|---|
| Base cost | $4/user/month | $0 (open-source) |
| Compute (2,000 min/month) | ~$16/month | ~$20/month (VPS) |
| Compute (10,000 min/month) | ~$80/month | ~$20/month (same VPS) |
| ARM builds | 2x pricing | Native (ARM VPS) |
| Storage (artifacts) | 500 MB included, then $0.25/GB | Your disk (included) |
| Private repos | Included | Included |
| Maintenance | $0 | Your engineering time |
Conclusion and Future Outlook
Migrating from GitHub Actions to Woodpecker was not about rejecting GitHub — it's about choosing the right tool for the right constraints. As a platform engineer, owning the CI/CD layer gives me:
- Predictable costs regardless of pipeline volume
- Full observability into build infrastructure
- Hardware flexibility — ARM, GPU, or specialized build environments
- Data sovereignty — code and artifacts never leave my infrastructure
- Vendor independence — the freedom to change forges without rewriting pipelines
Woodpecker is not a silver bullet. If you're a small team with simple needs, GitHub Actions is hard to beat for convenience. But if you're managing multiple services, care about infrastructure ownership, or simply want to stop paying per-minute for compute you already own — Woodpecker is a remarkably capable alternative.
What's Next
Looking ahead, I'm exploring:
- Kubernetes-native agents: Running Woodpecker agents as Kubernetes pods for elastic scaling — spin up agents on demand and release resources when idle.
- Autoscaling with cloud VMs: Using Hetzner Cloud API to provision spot instances as Woodpecker agents during peak load, tearing them down automatically after builds complete.
- Centralized secret management: Integrating HashiCorp Vault with Woodpecker for dynamic secrets — database credentials, API tokens, and certificates that rotate automatically.
- Pipeline-as-code templates: Building a shared library of
.woodpecker.ymltemplates that standardize CI/CD patterns across all repositories in the organization.
Appendix
Sample .env File
# Woodpecker Server
WOODPECKER_HOST=https://ci.yourdomain.com
WOODPECKER_GITHUB=true
WOODPECKER_GITHUB_CLIENT=Iv1.xxxxxxxxxxxxxxxx
WOODPECKER_GITHUB_SECRET=xxxxxxxxxxxxxxxxxxxxxxxxxxxxxxxxxxxxxxxx
WOODPECKER_AGENT_SECRET=64_char_hex_string_generated_with_openssl_rand
WOODPECKER_ADMIN=your-github-username
WOODPECKER_LOG_LEVEL=info
Complete Docker Compose (Production-Ready)
# docker-compose.yml — Production Woodpecker setup
# Gist: https://gist.github.com/monzim/c4bbe8c0336bff097e0fc5014c09bb51

services:
  woodpecker-server:
    image: woodpeckerci/woodpecker-server:latest
    container_name: woodpecker-server
    restart: unless-stopped
    ports:
      - "8000:8000"
    volumes:
      - woodpecker-server-data:/var/lib/woodpecker/
    environment:
      - WOODPECKER_HOST=${WOODPECKER_HOST}
      - WOODPECKER_OPEN=false
      - WOODPECKER_GITHUB=${WOODPECKER_GITHUB}
      - WOODPECKER_GITHUB_CLIENT=${WOODPECKER_GITHUB_CLIENT}
      - WOODPECKER_GITHUB_SECRET=${WOODPECKER_GITHUB_SECRET}
      - WOODPECKER_AGENT_SECRET=${WOODPECKER_AGENT_SECRET}
      - WOODPECKER_ADMIN=${WOODPECKER_ADMIN}
      - WOODPECKER_LOG_LEVEL=${WOODPECKER_LOG_LEVEL:-info}
    logging:
      driver: "json-file"
      options:
        max-size: "10m"
        max-file: "5"
    healthcheck:
      test: ["CMD", "wget", "-qO-", "http://localhost:8000/healthz"]
      interval: 30s
      timeout: 5s
      retries: 3

  woodpecker-agent:
    image: woodpeckerci/woodpecker-agent:latest
    container_name: woodpecker-agent
    restart: unless-stopped
    depends_on:
      woodpecker-server:
        condition: service_healthy
    volumes:
      - /var/run/docker.sock:/var/run/docker.sock
    environment:
      - WOODPECKER_SERVER=woodpecker-server:9000
      - WOODPECKER_AGENT_SECRET=${WOODPECKER_AGENT_SECRET}
      - WOODPECKER_MAX_WORKFLOWS=4
      - WOODPECKER_HEALTHCHECK=true
    security_opt:
      - no-new-privileges:true
    deploy:
      resources:
        limits:
          cpus: "2.0"
          memory: 2G
    logging:
      driver: "json-file"
      options:
        max-size: "10m"
        max-file: "5"

volumes:
  woodpecker-server-data:
    driver: local
Resources and References
- Woodpecker CI Documentation
- Woodpecker CI GitHub Repository
- Woodpecker Plugin Index
- Docker Compose Documentation
- Traefik Proxy Documentation
- Prometheus Monitoring
This post reflects my experience as a platform engineer running Woodpecker CI in production. Your mileage may vary depending on team size, workload patterns, and infrastructure constraints. As always, evaluate tools in the context of your specific requirements.